Marinated eggplant

Deep summer is when eggplant is everywhere at the market.  All kinds.  Sicilian.  Japanese.  Purple.  White.  Striped.IMG_0227

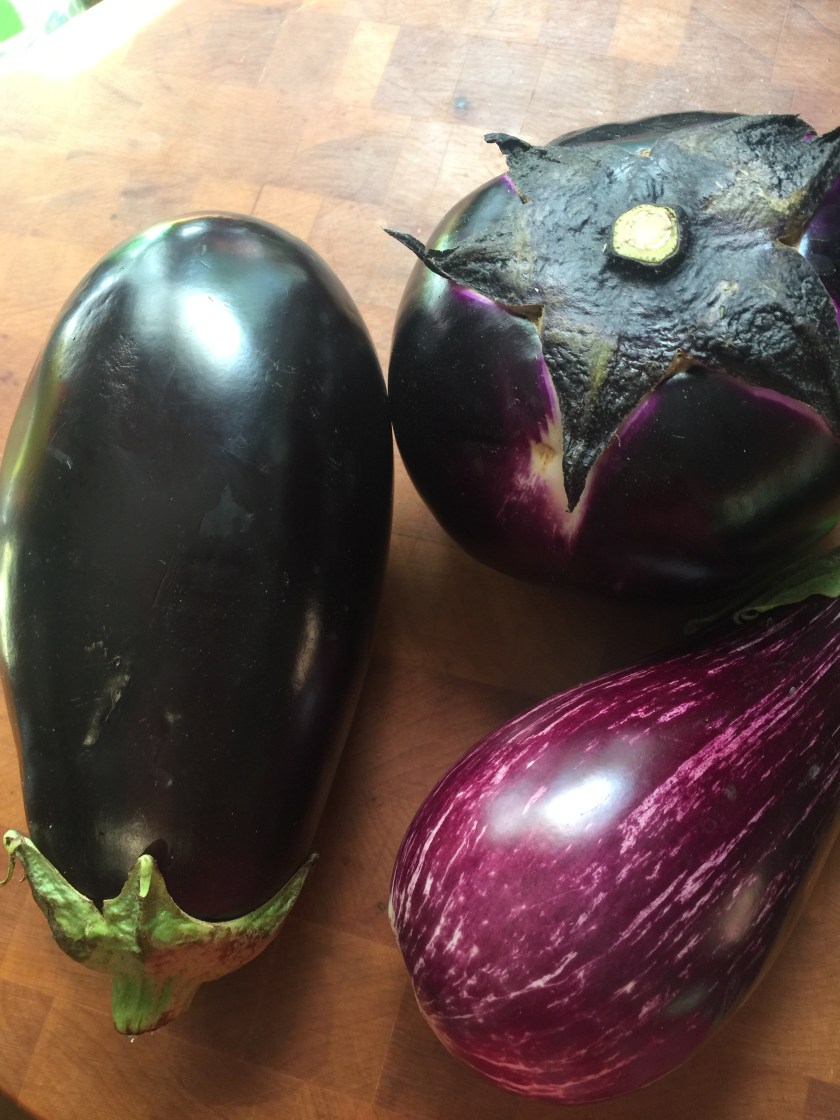
Usually eggplant is turned into a large heavy casserole of breaded and fried eggplant slices smothered with tomato sauce and melted cheese.  And there is nothing wrong with that.  Extremely delicious!  And a lot of work!  This summer has been hot and humid followed by hotter and more humid followed by oppressive.

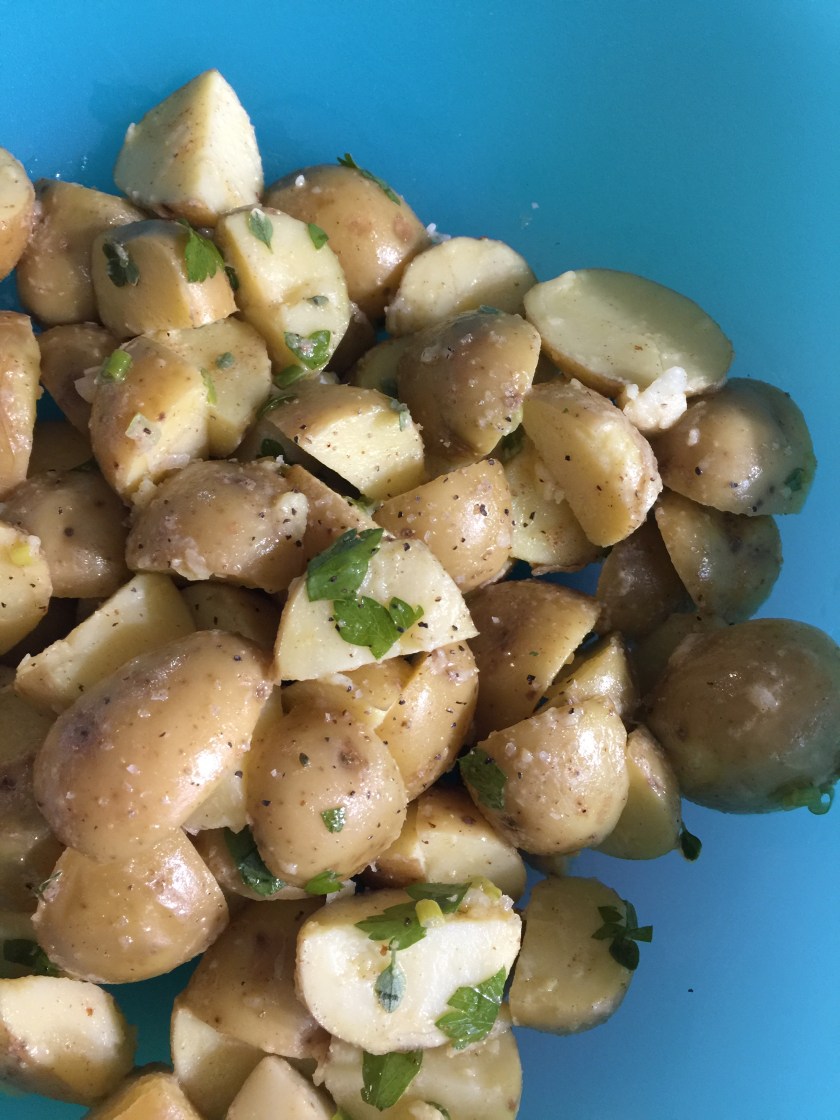
Here’s a simple recipe for marinated eggplant that takes little effort and produces a light and delicious side dish or salad ingredient that will last for several days.

First choose some lovely eggplants.  I like to peel them but they don’t have to be.  Next slice and salt.  Slicing and sprinkling with salt and draining in a colander will take the bitterness out of the eggplant.  Some are not bitter at all but for this recipe I de-bitter them all.  Sicilian eggplant are round and fat and are quite sweet.  Japanese eggplant are long and thin and are also sweet.

Let the salted eggplant slices sweat off their juice for about an hour.   Rinse them.  Dry them. (The yellow bowl shows the juice that drained out of the eggplant slices).


Fry the dried slices in olive oil.  Eggplant slices soak up oil like sponges so be careful.  You do not want too much oil.  Drain the fried eggplant slices on a paper towels.  Allow to cool slightly.

While the eggplant slices are cooling, mix the marinade.  Use 4 parts olive oil to 1 part vinegar.  I used extra virgin olive oil and red wine vinegar.  But you can mix what you prefer. Then add a Tablespoon of dried or 2 Tablespoons of fresh herbs.  I used a mixture of basil, oregano, garlic, parsley, thyme.  But,  here again, you can be creative and use what herbs you like best. IMG_0250

When the eggplant slices are no longer hot, put them in a container and pour the marinade over them.  Cover and refrigerate.  Periodically turn the slices so they are all covered some of the time.  These will last about a week in the refrigerator.


These marinated slices of eggplant are delicious with sliced fresh tomatoes on a roll.  They are delicious and make an elegant lunch or late dinner on a platter with tomatoes, salamis, cheeses, bread, olives, marinated artichokes, etc.  And, of course, they are wonderful eaten at the open refrigerator and eaten with a fork.

Eggplant is a wonderful treat during the hot summer and this is a simple and delicious way to enjoy it.IMG_0258


Eggplant is everywhere….Springdale Farms, Flaim Farms, Buzby Farm, Savoie Organic Farm, Muth Family Organic Farm, Vireck Farm, Formisano Farm, Fruitwood Farm!

Extra Virgin Olive Oil = Villa Barone

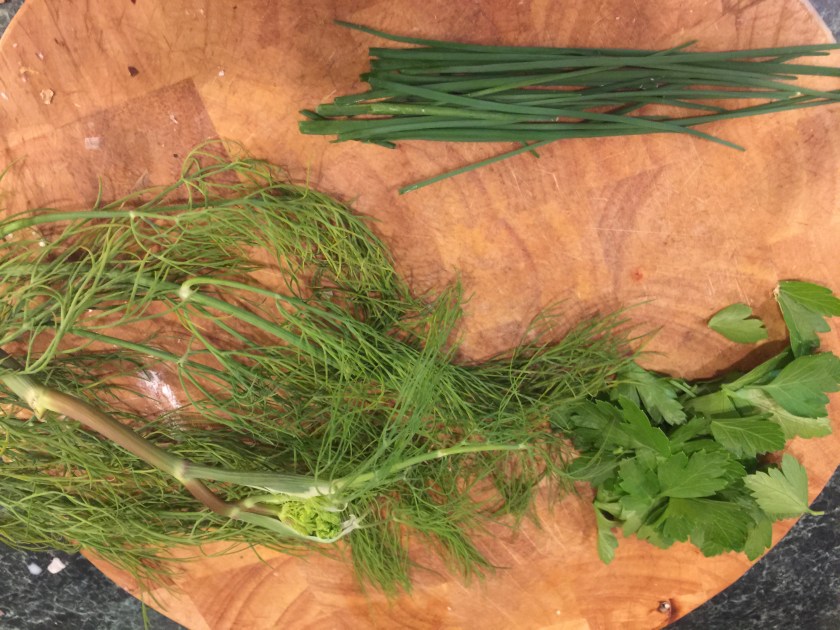
Fresh herbs – Flaim Farm, Formisano Farm

Out of this world chicken meatballs.

My grandson, who is five, made these and ATE them!  That is proof positive that these meatballs are mighty marvelous!  When trying a new food my grandson will either say “no thank you” or “it’s a little good”.  These meatballs got a thumbs up and were requested to be made again for supper.

This recipe is full of fresh seasonal ingredients.  It makes 12 to 14 meatballs baked on a tray.  While younger palates like the meatballs on their own…I think the addition of a pesto mayonnaise would be delightful.    That would be just some mayonnaise mixed with basil pesto in a bowl.  Measurements to your taste.

IMG_7320

Ingredients:

1/4 teaspoon of granulated garlic (that’s the children’s version)…two cloves of diced/smashed garlic paste for an all adult party.

1/4 cup fresh basil leaves sliced very thin

1 large zucchini, grated

1 large ear of fresh corn cut off the cob

1 egg

1 teaspoon salt

1/2 teaspoon pepper

1/4 cup grated parmesan cheese

1/2 cup Panko bread crumbs

1 pound ground chicken


Directions:

  1.  Finely mince the basil.
  2. Grate the zucchini
  3. Add the garlic and basil to the zucchini
  4. Add the corn
  5. Break the egg in a bowl and whisk until smooth
  6. Add the egg, salt and pepper to th zucchini
  7. Add the parmesan, bread crumbs, and ground chicken
  8. Mix all ingredients together
  9. Form 1/4 cup scoops into meatballs
  10. Place on a lied baking sheet and bake for 12 minutes at 425 degrees Fahrenheit.IMG_7321IMG_7323


Ground chicken from Hillacres Pride (did you know they sell that?…..they do now!!)

Eggs from Hillacres Pride

Basil from Flaim or Formisano Farms

Zucchini from A. T. Buzby, or Viereck Farm, or Muth Organic Farm, or Springdale Farm, or Savoie Organic Farm, or Fruitwood Farms.

Corn from A.T. Buzby, Echert’s, or Muth Organic Farm,

Parmesan cheese from Villa Barone


Quick and easy zucchini bread.

A while back I blogged a recipe for “Z” bread.  It is a wonderful recipe.  But it is a big recipe.  Big loaf.  Big work.  This is an easy and quick recipe.  Two bowls, a spoon, and a loaf pan.  Easy.

The bread is delicious.  Bakes well.  Looks nice.  Tastes great.  And uses up a couple of zucchini.  I choose to use small to medium specimens for this recipe.  The GIANT zucchini that hide in your garden until you trip over them or the ones that get left on your front porch in the middle of the night are not really good for this recipe.


Ingredients:

3 eggs
1 cup vegetable oil
1 cup sugar
2 cups grated, unpeeled zucchini (about two medium…I use the small grater holes)
2 cups flour
1 teaspoon baking soda
1 Tablespoon baking powder
1 teaspoon salt
1 teaspoon cinnamon
1/4 teaspoon nutmeg

IMG_0194

Directions:
1.  Heat the oven to 350 degrees Fahrenheit.  Grease a 9 by 5 inch loaf pan.

2.  Combine the eggs, oil, and sugar in a large bowl and mix until well combined.  Stir in the zucchini.  (You could add walnuts, raisins, and/or chocolate chips at this point).IMG_0196

3.  In a separate bowl, combine the flour, baking soda, baking powder, salt, cinnamon, and nutmeg and stir well.

4.  Pour the dry ingredients over the zucchini mixture and stir until well combined.


IMG_0199

5.  Pour the mixture into the loaf pan and bake until a toothpick inserted in the middle comes out clean, about 65 to 70 minutes.  Makes one loaf.


IMG_0206
The longest part is the bake.  The hardest part is waiting for the bread to cool.  Delicious by itself, or spread with butter or cream cheese….while sipping a large glass of iced tea!


Zucchini from A. T. Buzby Farm

Eggs from Hillacres Pride

Meat and potatoes

It’s the middle of summer and who wants to think about a pot roast.  But here we are.  Thinking about pot roast.  Sometimes it is really too hot to grill.  My husband doesn’t think so, but I do.  I don’t want him standing over a hot grill while I’m in the air conditioned kitchen.

And…I get tired of summer food.

I am a member of a CSA (Community Supported Agriculture) and have been for several years.  I support A. T. Buzby Farm from Woodstown, Salem County, New Jersey.  I pay them in February to support their farm and they bring me a variety box of vegetables from May through October.  I pick the box up at their stand at the Collingswood Farmers’ Market.  The contents of those boxes dictate what I eat for the week.  I do shop at many other farms stands each week, but my vegetable theme of the week is provided for me by  my Buzby CSA.

This is a photo of the contents of the box this week (those of us who are members get a photo every week so we know what’s coming).fullsizeoutput_6120

When I looked at the box I knew a pot roast was going to be on my menu this week.  I saw carrots, potatoes, and a beautiful Spring onion.  So I  bought a beef chuck roast from Hillacres Pride.  My favorite cut for pot roast. IMG_0148

Ingredients:
beef chuck roast
carrots
potatoes
onion
salt and pepper to taste
pinch of granulated garlic (or however you like your garlic)
1/2 cup water

Directions:
Preheat the oven to 350 degrees Fahrenheit.  Dry the meat with paper towel.

Slice the onion and spread on the bottom of an oven proof casserole that has a lid.  Place the meat on top of the onions.  Season the meat with salt and pepper and granulated garlic…to your taste.

Wash and cut up the carrots and potatoes so they are about the same size and put them around the roast in the casserole.  Pour a 1/2 cup of water into the casserole. IMG_0154Put a piece of aluminum foil on the top of the casserole and then the lid to seal in all the steam and liquid.


Place the casserole in the middle of the oven and let bake for 3 hours.

IMG_0157
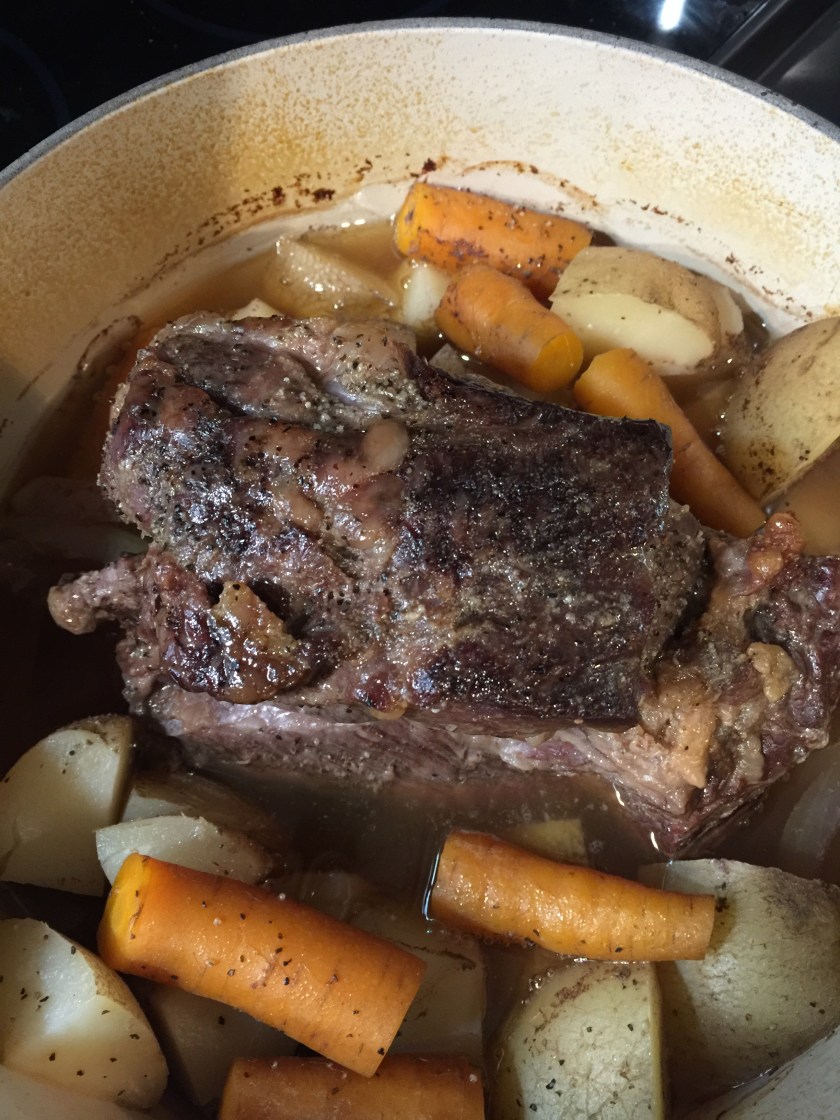
After three hours, remove the lid and put the meat on a serving platter.  I like to mash the potatoes with butter before serving and sometimes mix the carrots into the potato mash.  But you can simply put the meat, potatoes, and carrots on a large platter and serve.  Using the juice and the onions in the bottom of the pot, make gravy.  Sprinkle with some finishing flour (like Wondra) and either mix with a whisk or spoon or an immersion blender (my preference).

Great meal for winter.  Great meal for summer…especially if your farmer inspires you!IMG_0160

Butter cream icing

Have you ever noticed how birthdays tend to cluster in families?  From March until the end of June our immediate family has a dozen.  Cakes for weeks.  And all different flavors…chocolate, banana, vanilla, carrot.  But each one must be iced with homemade butter cream icing.

This recipe was my grandmother’s.  It was taught to me by my mother.  And I taught it to my daughters.  There is a list of ingredients and there are directions…but it is all accomplished “by feel” and taste.  (You can do this JM!)  This is a technique more than it is a recipe.  I hope you will choose to try it, learn it (by heart…easy!), and pass it on to others.

Ingredients: (all are easily available at your local supermarket)

8 ounces unsalted butter, at room temperature  (I use freshly made butter that I buy from my local farmers’ market…)

at least a 1 pound box of powdered confectioner’s (10X) sugar (I always have two at the ready or a large bag.

1 teaspoon vanilla extract

at least 1/4 cup whole milk
IMG_0107

Directions: Have all your ingredients in front of you, ready to use.

  1. In the bowl of an electric mixer or in a large bowl using an electric hand-mixer (I usually use my hand-mixer), beat the butter and vanilla for a minute or two, until fluffy.
  2. Begin adding….by heaping spoonful…the powdered sugar.
  3. Because the mixture will be dryish…not resembling icing…add some milk.  Just a little bit, a splash.
  4. This is where the technique and trying comes in.  Continue adding sugar and a little bit of milk until the icing is the consistency to spread with a knife or spatula.  Make sure all of the butter and sugar are incorporated.  Add sugar until the mixture appears dry BEFORE adding more milk.

  5. Stop and check the texture and, of course, taste.IMG_0122
  6. With that amount of butter you should have plenty to ice an entire cake.

  7. After the cake is iced, find someone to help lick the beaters and clean out the bowl…

This icing makes any cake great…a box cake or from scratch.  It’s the icing that raises the bar!

Butter was purchased from Hillacres Pride from the Collingswood Farmers’ Market.

The photos here are of my daughter’s banana cake iced for her birthday.  The banana cake recipe follows.


Banana Birthday Cake

Ingredients:
2 1/4 cups sifted cake flour
5 Tablespoons all-purpose flour
1 1/2 teaspoons baking soda
1/2 teaspoon salt
1 cup buttermilk, at room temperature
2-3 very ripe bananas, mashed (about 1 cup)
10 Tablespoons unsalted butter at room temperature (1 1/4 sticks)
6 Tablespoons vegetable oil
3/4 cup lightly packed light brown sugar
1 teaspoon vanilla extract
3 large eggs at room temperature

Directions:
1. Preheat the oven to 350 degrees Fahrenheit.  Grease two 9-inch round pans using butter or baking spray.  I use baking spray with flour in it.

2.  Sift both flours, baking soda, and salt together into a small bowl and set aside.

3.  In a second small bowl, mash the banana and stir in the buttermilk

4.  In the bowl of an electric mixer…cream the butter, oil, both sugars, and vanilla on medium speed until light and fluffy (about 2 minutes).  Scrape the bowl with a rubber spatula.

5.  Add the eggs one at a time to the butter mixture and mix on medium speed after each addition until blended, about 10 seconds.  Scrape the bowl each time.

6.  Add 1/3 of the dry ingredients with the mixer on low speed for about 10 seconds.  Scrape the bowl.  Add 1/2 the banana mixture, mix for 10 seconds.  Scrape the bowl. Add the rest of the dry ingredients and the rest of the banana mixture and mix for 10 seconds.  Scrape the bowl and then stir the batter with a wooden spoon several times by had to mix thoroughly.

7,  Pour the batter into the prepared pans.  Bake on the center oven rack until the top is golden, springs back to the touch, and a tester inserted in the center comes out dry.  (30 to 35 minutes).

8. Place the cakes on a rack to cool completely.

9.  Eat as is, sprinkled with powdered confectioner’s sugar, or iced with butter cream icing.


IMG_8486

Moomin’s vegetable patch summer soup

My husband (known as Pop to his grandsons) is a book person.  Always has been.  Always will be.  He has been reading books to his grandsons (as he did with his daughters) since they were very very young.  He has a wonderful reading voice and even as infants they responded to him.

Our oldest grandson is five years old.  Pop and he have been sharing longer (chapter books) more interesting stories.  They’ve read many Enid Blyton books about the Famous Five and now they are reading Tove Jansson’s Moomin stories.  The Moomins are a fairytale family of Finnish “trolls” who have adventures with their friends and neighbors in Moomin Valley.  Everyone in our family now knows about Moomins.

My daughter, Moomin Reader’s mother, recently purchased the Moomin Cookbook.  She and her sons have made pancakes, cocoa, and, most recently, Vegetable Patch Summer Soup.  They went to the Collingswood Farmers’ Market and easily purchased all of the vegetables needed.

Ingredients:

2-3 carrots
4-6 potatoes
2/3 cup of sugar snap peas (in shells) or 1/4 cup fresh peas (not in shells)
1 small head of cauliflower cut into florets
2 Spring onions (optional)
1 turnip (optional)
2 cups water
1 teaspoon salt
2 cups whole milk
1 Tablespoon plain flour
1 Tablespoon butter
finely chopped chives, parsley, and dill

Directions:

  1.  Rinse and roughly chop the vegetables.IMG_7277
  2. Measure the water into a saucepan.  Bring it to a boil and add salt, carrots, peas, onion, and turnip (if using).  Allow this to simmer for 3-4 minutes then add the potatoes and cauliflower florets.  Simmer on low heat for 10 minutes or until the vegetables are almost soft.IMG_7278
  3. Cook the flour into the melted butter until it is a paste. Whisk the flour mixture into the milk and add this mixture to the soup.IMG_7280
  4. Simmer gently for a further 10 minutes.  Make sure the soup does NOT BOIL
  5. Finely chop the fresh chives, parsley, and dill.  Sprinkle the chopped herbs over the finished soup either in the saucepan or once it has been served into bowls.IMG_7279IMG_7281


The soup was a big hit.  The children were a little skeptical about the fresh herbs…but they ate it quite happily…like their Moomin friends would!

iu

Moominmama making soup!

Cauliflower and fresh dill from Muth Family Organic Farm|
Peas from Springdale Farm.
Viereck Farm sells sugar snap peas
Carrots from the AT Buzby CSA share
Potatoes from Savoie Organic Farm
Spring onion from Formisano Farm and Muth Family Organic Farm
Fresh herbs from Flaim Farm and/or Formisano Farm

Crazy tomato cracker salad

This is the craziest and most delicious side dish ever!  If you are a true fan of Jersey tomato sandwiches, you will love, love, love this!  And making it will make you smile almost as much as eating it.

Ingredients:

3 medium tomatoes, seeded and chopped
(this is a great recipe to use tomatoes that are a little soft),

1/4 cup mayonnaise

1/2 to 2/3 of a sleeve of saltine style crackers (your preference)

IMG_0092

Directions:

  1.  Wash, seed, and chop the tomatoes and put them in a bowl (seeding the tomatoes helps prevents soggy crackers)
  2. Dump mayonnaise in the bowl with the chopped tomato
  3. Crush saltine style crackers (do NOT pulverize and make crumbs) and dump in the bowl with the tomatoes and mayonnaiseIMG_0093
  4. Mix all ingredients together
  5. Eat! (do not let this sit for long…don’t want soggy crackers).

IMG_0095

Done!  I told you …crazy.  Crazy delicious!  This would be a super side dish for burgers (any kind…veggie, beef, bison, turkey…) at your next picnic!  No roll needed!

Tomatoes were purchased at Collingswood Farmers’ Market vendors….AT Buzby Farm, Springdale Farm, Viereck Farm….any Jersey tomatoes will be perfect!

Crustless blueberry pie!

One problem I have after shopping at the Collingswood Farmers’ Market is that I buy too much.  I frequently buy too much of one thing, usually the newest crop to arrive for sale.  This week.  Too many blueberries!

But wait.  Here is an easy (no mixer) dessert that uses 2 1/2 pint boxes of fresh blueberries.  And is absolutely delicious!

Perfect for a picnic dessert!


Ingredients:

1 cup plus 2 Tablespoons granulated sugar, divided
1 cup all-purpose flour
1 teaspoon cinnamon
1/4 teaspoon salt
1/2 cup (1 stick) unsalted butter, melted
2 large eggs
1 teaspoon vanilla extract
2 cups plus 1/4 cup fresh blueberries, divided

Instructions:

1.  Preheat oven to 350 degrees Fahrenheit.  Spray a 9 inch round pie dish very well with cooking spray; set aside.IMG_0068

2. In a large bowl, add sugar, flour, cinnamon, salt, and whisk to combine; set aside.IMG_0071

3.  In a glass microwave proof bowl or cup, add the butter and heat in a microwave to melt.  Wait a few minutes for the butter to cool before adding the eggs so they don’t get scrambled.

4.  Add the eggs and vanilla to the butter and whisk to combine.IMG_0072

5.  Pour the wet mixture over the dry ingredients and stir to combine; don’t over mix.

6.  Add 2 cups of blueberries and stir to combine;  batter is very thick.

7.  Put the mixture into your prepared pie dish.  Smooth the top lightly with a spatula.

8.  Evenly sprinkle 1/4 cup blueberries over the top.IMG_0079

9.  Evenly sprinkle 2 Tablespoons sugar (that you set aside) over the top and bake for 34 to 39 minutes or until edges are set and a toothpick inserted in the center comes out clean or with a few moist crumbs but no batter.IMG_0080

10.  Allow the pie to cool in pie dish on a wire rack before slicing and serving.  Can be topped  with whipped cream or ice cream.  Pie will keep airtight at room temperature for up to 5 days.  If it lasts that long!

IMG_0082

Blueberries purchased from AT Buzby, Muth Family Organic Farm, and Springdale Farms. They are available nearly EVERYWHERE in the market!

Steak dinner for Dad!

This Sunday is Father’s Day.  If you shop at the Collingswood Farmers’ Market you can purchase everything needed to make a perfectly wonderful summer grill.

Our meat of choice for this grill is a bison rib eye steak.  My husband is newly retired and is having a great time with his smoker and grill.  He has discovered that all one really has to do to be successful is PAY ATTENTION.  We both have fond and not so fond memories of our fathers burning nearly everything they cooked in the name of charcoal grilling.

To cook our bison rib eye steaks, my husband used a method called cold grate reverse sear.  It requires a grill with a spinning grate, a meat thermometer, and for the cook to pay attention.

If you are interested you can learn the method used here: Cold Grate / Reverse Sear Rib Eye Steak .  But I’m sure that your dad will love steak (or even burgers) cooked the way you usually do.

IMG_0052

What makes this dish holiday special is the addition of (and discovery of) a NEW item from Hillacres Pride (purveyors of meat, poultry, and cheese)….Maitake fresh cheese.  It is a soft spreadable cheese made by Judy that includes Maitake mushrooms from Davidson’s Mushrooms.  Tasting was available and it was delicious.  It would be wonderful on a cracker or grilled bread.  It was great on that little plastic spoon!  But it really cried out to be melted on grilled meat.  A steak. A burger.

So grill your meat and plop a dollop of Maitake fresh mushroom cheese on right before serving.


Spring cauliflower is available now.  And it is delicious.  Much more delicate in flavor than the fall variety (which I also love).  I cleaned and cut up a small head of cauliflower and dropped it into my steamer basket for about ten minutes.  The cauliflower should be easily pierced with a knife, but it should not be mushy.


While steaming the cauliflower, melt butter in a large frying pan.  When the butter is melted sprinkle in 1/4 to 1/2 cup of panko breadcrumbs.  Stir around until the panko starts to color.  Do not burn!  Then place the cooked cauliflower into the skillet with the butter and panko and stir to coat and crisp.  Again.  Do not burn.  Salt to taste.


In case your father is not a cauliflower fan…..

In a large skillet melt about two tablespoons of butter.  Cut up a garlic scape (don’t use the knuckle) and a spring onion.  Saute them lightly until the onion is translucent and the garlic scape is a bit limp.  Next clean and cut up a zucchini, clean and half some sugar snap peas, and clean and cut up some mushrooms.  Put all the vegetables in the skillet with the garlic, onion, and butter.  Sprinkle lightly with salt and put a lid on the pan.  Lower the heat under the pan to medium/low and let it cook until the zucchini is no longer crisp.  About ten minutes.  When the vegetables are done, scoop some Bacon Chive Cheddar spread from Cheese Etc. (they are at the market every other week).  Put the lid back on to melt the spread.  When read to serve, stir the vegetables and melted cheese together.


When I was a child, my father ate everything on the table.  Whatever was there, he ate it all.  After my mother passed away, I noticed my father didn’t eat cooked vegetables.  I asked him about it.  Perhaps I wasn’t making the ones he liked.  He said that he preferred raw vegetables…indeed he ate carrots, broccoli, celery, lettuce, tomatoes, cucumbers…raw.  He went on to say that he ate them when I was young because he was setting a good example.  Indeed he did.

If your father is like mine…he probably won’t eat either of these vegetable dishes.  He’ll eat the steak…with the Miatake fresh cheese melted on top.  And he’ll eat the gorgeous fresh salad also prepared with fresh lettuces, cucumbers, hot house tomatoes.  But I’m guessing he’ll simply enjoy having a meal with you…

There are lots of new things appearing at the market.  Spring has sprung and summer it hot on its heels.  Experiment.  Take a stroll through the market.  Try new things.  You really can’t make a mistake.


Food purchased for this post:

Rib Eye Steak : Buck Wild Bison
Maitake Fresh Cheese, butter: Hillacres Pride
Cauliflower, oak leaf lettuce: Muth Family Organic Farm
Garlic Scapes: Savoie Organic Farm
Bacon Chive Cheddar cheese spread: Cheese Etc.
Zucchini, tomatoes, cucumbers: AT Buzby Farm
Sugar snap peas : Viereck Farm
Spring onion: Formisano Farm
Mushrooms: Davidsons

Purple bok choy!

IMG_9964
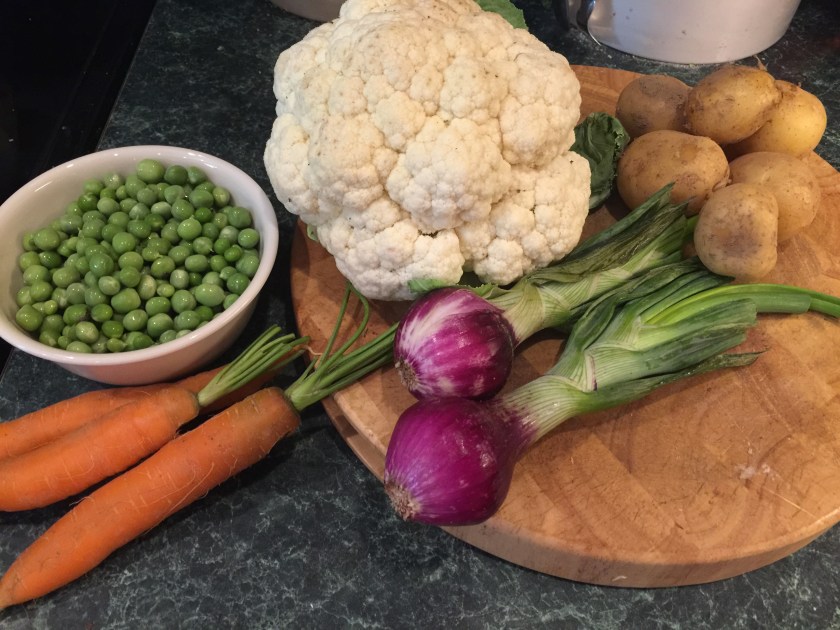
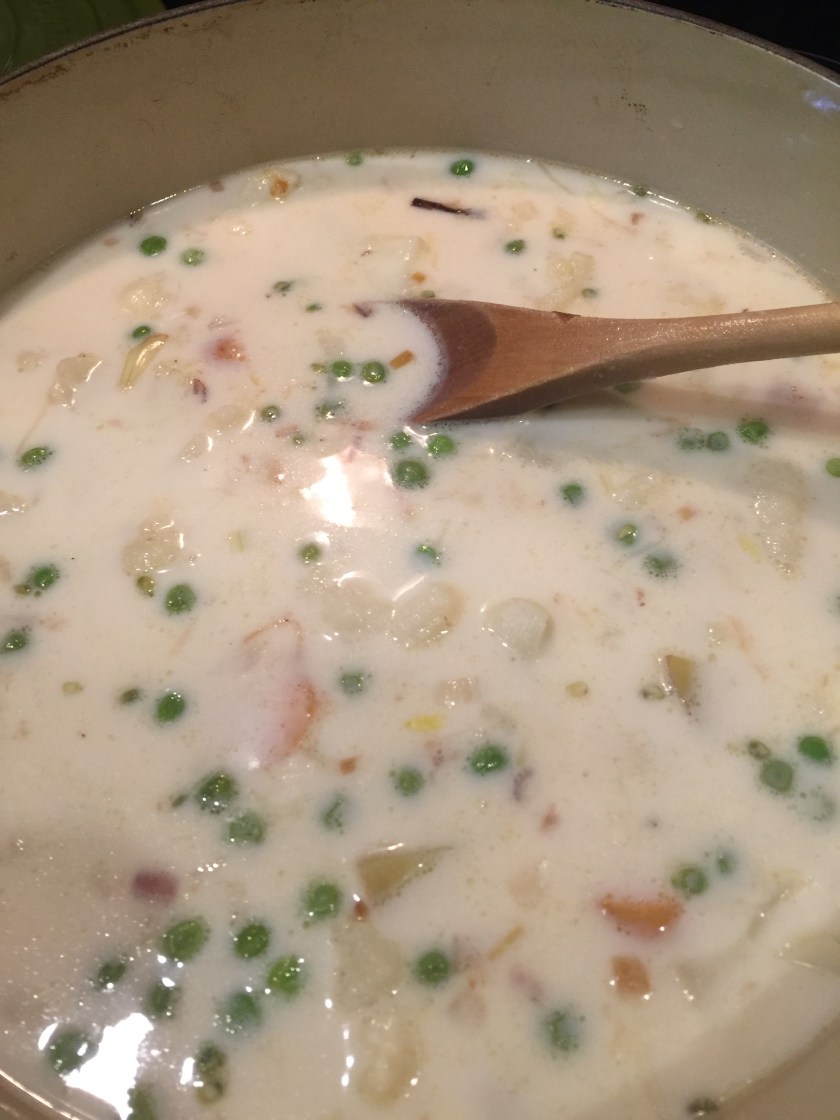
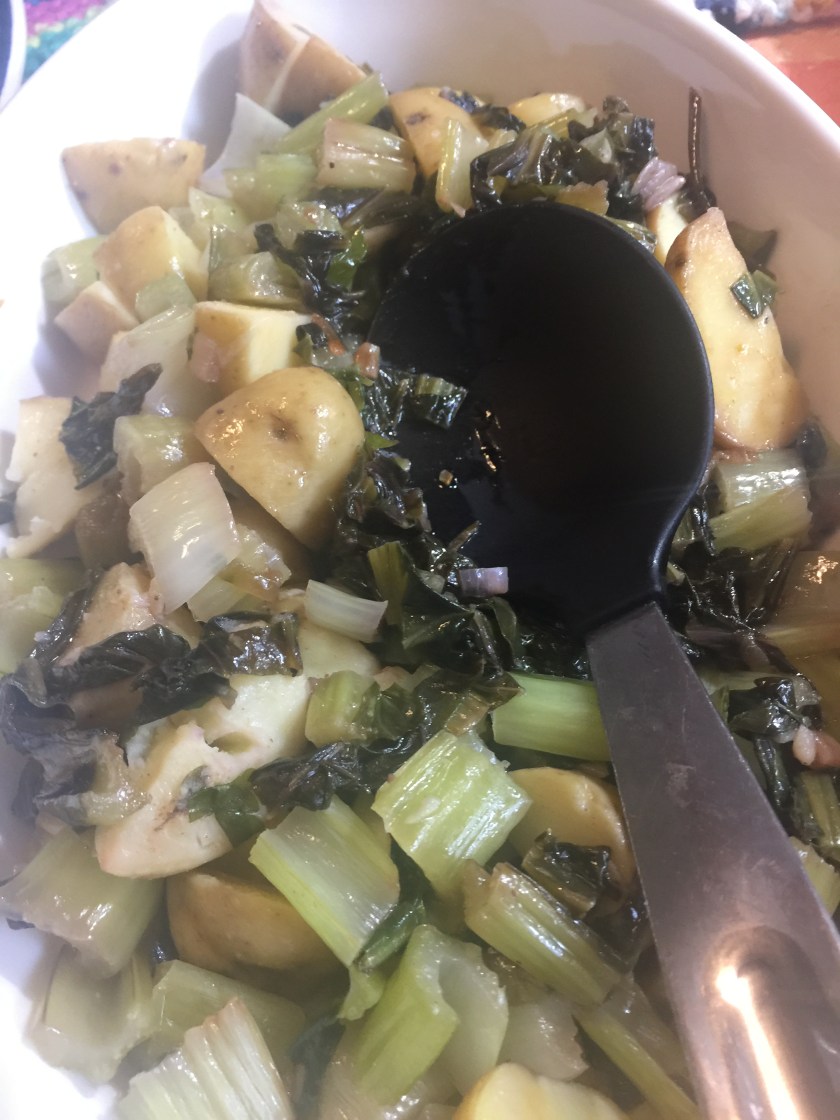
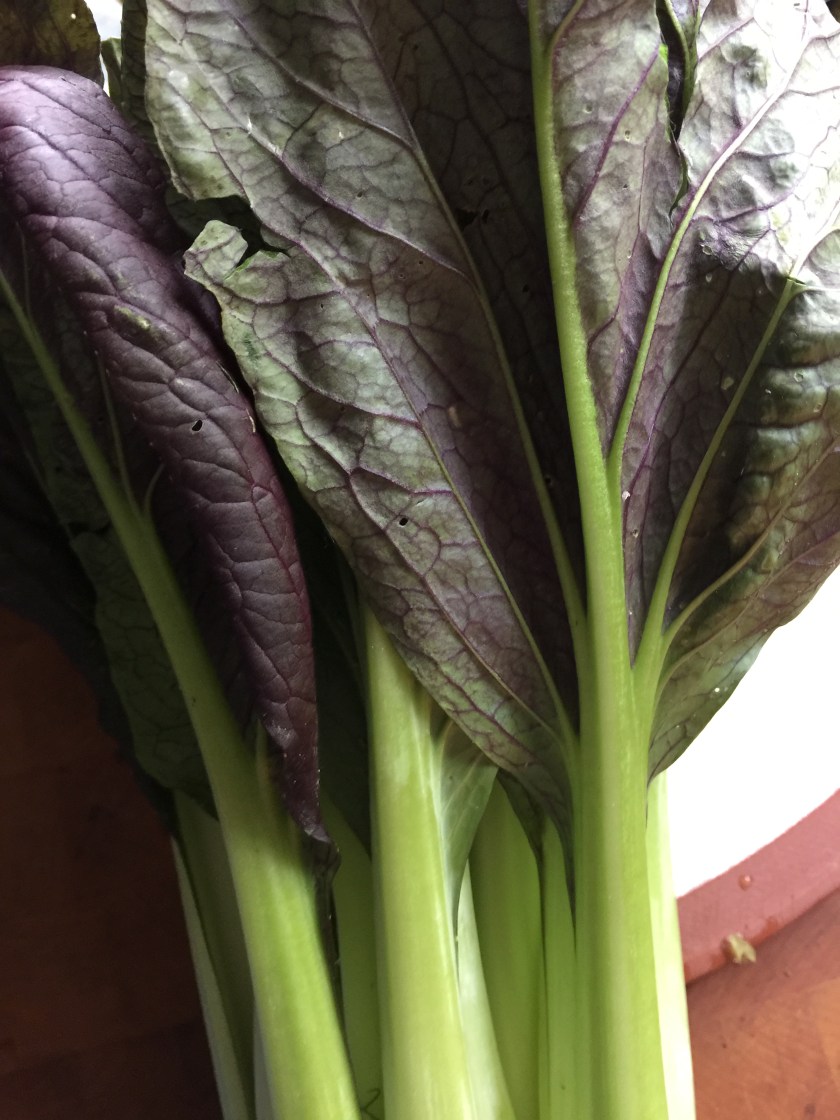
Spring greens are coming into their own.  The market is full of lettuces, kales, spinach, and bok choy.  For the first time I’ve seen purple bok choy for sale. Purple!  Exotic.  Lovely.

I asked the man behind the table if indeed that was purple bok choy.  And he nodded with a smile.  “It’s delicious too,” he said…as if being beautiful wasn’t enough.  He went on to explain that he had made a dinner of it just the night before.  He said he sauted it with some onion and then threw in some potatoes.  He said, “it was a whole meal and delicious”!

I find that when I ask the people behind the tables…the farmers…their helpers…I get the best information.  And today I got inspiration too.

I had never had purple bok choy before.  I asked.  I learned.  I cooked.  I ate.  I will buy again.

Ingredients:
1 head of purple bok choy, cut into strips
1 spring onion, diced
1 garlic scape, sliced
olive oil
salt and pepper
2 cups of cooked fingerling or small new potatoes or 2 cups of (leftover) French potato salad

Directions:
1. Cut the bok choy in thin strips and soake the cut pieces (stem and leaves included) in a large bowl of water for about ten minutes.  Swish the cut purples around, scoop them out, and put in a colander to drain.  Because there was almost no dirt in the bottom of the bowl I spray rinsed the vegetable one more time and let it drain.

2. In a skillet heat some olive oil on medium heat

3. First toss chopped onion and garlic scape into the heated olive and stir for about 3 minutes. (Those made their appearance at the market today too.  Spring onions are sweet and delicious and must be kept in the refrigerator.  Garlic scapes are an easy way to add mild garlic flavor…just don’t use the “knuckle”).

4. Next drop the drained bok choy into the skillet.  Stir to sauté.  Do not brown any of the vegetables in the skillet.  Cook over medium heat until the bok choy is crisp tender…about 12 minutes.

5. Finally, drop in about two cups cooked potatoes or leftover French potato salad.  Using the leftover French potato salad adds flavor as the dressing for the potato salad incorporates olive oil, apple cider vinegar, and dijon mustard.

IMG_9979

After adding the potatoes cook another five to ten minutes over medium heat.  Again do not let any of the vegetables brown.

BONUS RECIPE : French Potato Salad

Ingredients:
2 1/2 pounds fingerling or small new potatoes
coarse salt and ground pepper
1/4 cup olive oil
3 Tablespoons Dijon mustard
2 Tablespoons apple cider vinegar
1 green onion (scallion) minced
3 Tablespoons fresh parsley, chopped
1 teaspoon fresh thyme, chopped

Directions:
1.  Place potatoes in a large pot.  Cover with cold water by 1 inch and season generously with salt.  Bring to a boil…then reduce to a simmer and cook until the potatoes are tender, about 15 minutes.  Drain.  Cool slightly.

2.  While the potatoes are cooking, whisk together the oil, mustard, vinegar, green onion, parsley, thyme, season with salt and pepper.  Add the still warm potatoes and toss to combine.  Serve at room temperature. (To store, refrigerate).IMG_9961


This is a wonderful dish to go with grilled fish, chicken, pork, beef, or bison.   Add leftover French potato salad to the bok choy and you’ve made a delicious, nutritious, and elegant new side dish.

IMG_9982

There are many new vegetables appearing at the market.  Farmers are excited to share some new produce with us.  Purple bok choy…a winner!  What will be new next week?


Available at The Collingswood Farmers’ Market:
purple bok choy, green onions – Muth Family Organic Farm
spring onions (red and white) and fingerling potatoes – Formisano Farm
garlic scape – Savoie Organic Farm
fresh herbs – Flaim Farm