Out of this world chicken meatballs.

My grandson, who is five, made these and ATE them!  That is proof positive that these meatballs are mighty marvelous!  When trying a new food my grandson will either say “no thank you” or “it’s a little good”.  These meatballs got a thumbs up and were requested to be made again for supper.

This recipe is full of fresh seasonal ingredients.  It makes 12 to 14 meatballs baked on a tray.  While younger palates like the meatballs on their own…I think the addition of a pesto mayonnaise would be delightful.    That would be just some mayonnaise mixed with basil pesto in a bowl.  Measurements to your taste.

IMG_7320

Ingredients:

1/4 teaspoon of granulated garlic (that’s the children’s version)…two cloves of diced/smashed garlic paste for an all adult party.

1/4 cup fresh basil leaves sliced very thin

1 large zucchini, grated

1 large ear of fresh corn cut off the cob

1 egg

1 teaspoon salt

1/2 teaspoon pepper

1/4 cup grated parmesan cheese

1/2 cup Panko bread crumbs

1 pound ground chicken


Directions:

  1.  Finely mince the basil.
  2. Grate the zucchini
  3. Add the garlic and basil to the zucchini
  4. Add the corn
  5. Break the egg in a bowl and whisk until smooth
  6. Add the egg, salt and pepper to th zucchini
  7. Add the parmesan, bread crumbs, and ground chicken
  8. Mix all ingredients together
  9. Form 1/4 cup scoops into meatballs
  10. Place on a lied baking sheet and bake for 12 minutes at 425 degrees Fahrenheit.IMG_7321IMG_7323


Ground chicken from Hillacres Pride (did you know they sell that?…..they do now!!)

Eggs from Hillacres Pride

Basil from Flaim or Formisano Farms

Zucchini from A. T. Buzby, or Viereck Farm, or Muth Organic Farm, or Springdale Farm, or Savoie Organic Farm, or Fruitwood Farms.

Corn from A.T. Buzby, Echert’s, or Muth Organic Farm,

Parmesan cheese from Villa Barone


Quick and easy zucchini bread.

A while back I blogged a recipe for “Z” bread.  It is a wonderful recipe.  But it is a big recipe.  Big loaf.  Big work.  This is an easy and quick recipe.  Two bowls, a spoon, and a loaf pan.  Easy.

The bread is delicious.  Bakes well.  Looks nice.  Tastes great.  And uses up a couple of zucchini.  I choose to use small to medium specimens for this recipe.  The GIANT zucchini that hide in your garden until you trip over them or the ones that get left on your front porch in the middle of the night are not really good for this recipe.


Ingredients:

3 eggs
1 cup vegetable oil
1 cup sugar
2 cups grated, unpeeled zucchini (about two medium…I use the small grater holes)
2 cups flour
1 teaspoon baking soda
1 Tablespoon baking powder
1 teaspoon salt
1 teaspoon cinnamon
1/4 teaspoon nutmeg

IMG_0194

Directions:
1.  Heat the oven to 350 degrees Fahrenheit.  Grease a 9 by 5 inch loaf pan.

2.  Combine the eggs, oil, and sugar in a large bowl and mix until well combined.  Stir in the zucchini.  (You could add walnuts, raisins, and/or chocolate chips at this point).IMG_0196

3.  In a separate bowl, combine the flour, baking soda, baking powder, salt, cinnamon, and nutmeg and stir well.

4.  Pour the dry ingredients over the zucchini mixture and stir until well combined.


IMG_0199

5.  Pour the mixture into the loaf pan and bake until a toothpick inserted in the middle comes out clean, about 65 to 70 minutes.  Makes one loaf.


IMG_0206
The longest part is the bake.  The hardest part is waiting for the bread to cool.  Delicious by itself, or spread with butter or cream cheese….while sipping a large glass of iced tea!


Zucchini from A. T. Buzby Farm

Eggs from Hillacres Pride

Meat and potatoes

It’s the middle of summer and who wants to think about a pot roast.  But here we are.  Thinking about pot roast.  Sometimes it is really too hot to grill.  My husband doesn’t think so, but I do.  I don’t want him standing over a hot grill while I’m in the air conditioned kitchen.

And…I get tired of summer food.

I am a member of a CSA (Community Supported Agriculture) and have been for several years.  I support A. T. Buzby Farm from Woodstown, Salem County, New Jersey.  I pay them in February to support their farm and they bring me a variety box of vegetables from May through October.  I pick the box up at their stand at the Collingswood Farmers’ Market.  The contents of those boxes dictate what I eat for the week.  I do shop at many other farms stands each week, but my vegetable theme of the week is provided for me by  my Buzby CSA.

This is a photo of the contents of the box this week (those of us who are members get a photo every week so we know what’s coming).fullsizeoutput_6120

When I looked at the box I knew a pot roast was going to be on my menu this week.  I saw carrots, potatoes, and a beautiful Spring onion.  So I  bought a beef chuck roast from Hillacres Pride.  My favorite cut for pot roast. IMG_0148

Ingredients:
beef chuck roast
carrots
potatoes
onion
salt and pepper to taste
pinch of granulated garlic (or however you like your garlic)
1/2 cup water

Directions:
Preheat the oven to 350 degrees Fahrenheit.  Dry the meat with paper towel.

Slice the onion and spread on the bottom of an oven proof casserole that has a lid.  Place the meat on top of the onions.  Season the meat with salt and pepper and granulated garlic…to your taste.

Wash and cut up the carrots and potatoes so they are about the same size and put them around the roast in the casserole.  Pour a 1/2 cup of water into the casserole. IMG_0154
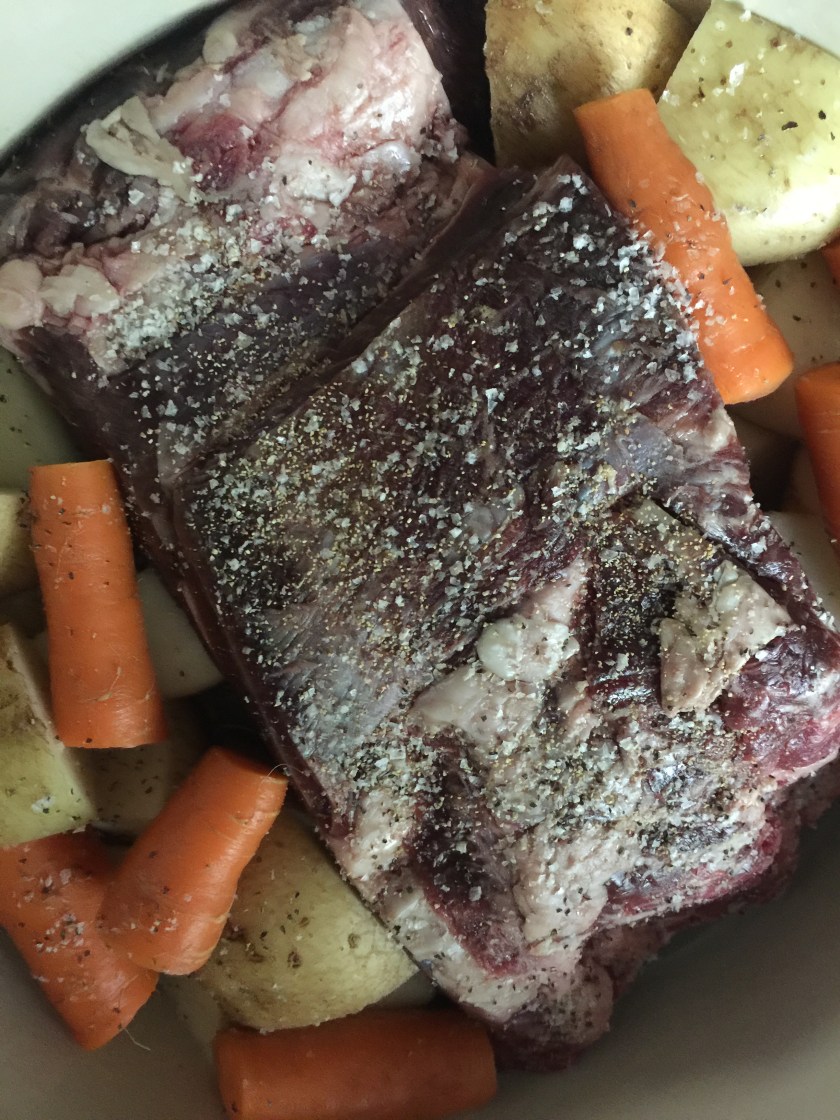
Put a piece of aluminum foil on the top of the casserole and then the lid to seal in all the steam and liquid.


Place the casserole in the middle of the oven and let bake for 3 hours.

IMG_0157
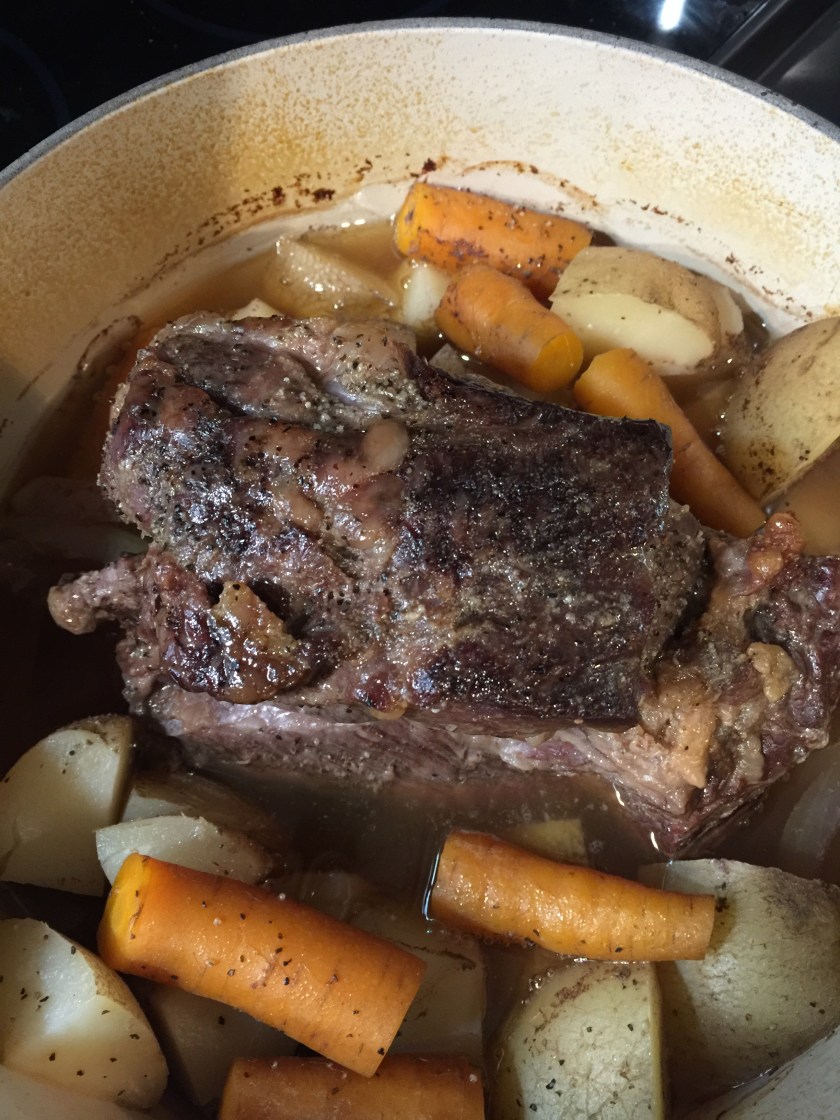
After three hours, remove the lid and put the meat on a serving platter.  I like to mash the potatoes with butter before serving and sometimes mix the carrots into the potato mash.  But you can simply put the meat, potatoes, and carrots on a large platter and serve.  Using the juice and the onions in the bottom of the pot, make gravy.  Sprinkle with some finishing flour (like Wondra) and either mix with a whisk or spoon or an immersion blender (my preference).

Great meal for winter.  Great meal for summer…especially if your farmer inspires you!IMG_0160

Butter cream icing

Have you ever noticed how birthdays tend to cluster in families?  From March until the end of June our immediate family has a dozen.  Cakes for weeks.  And all different flavors…chocolate, banana, vanilla, carrot.  But each one must be iced with homemade butter cream icing.

This recipe was my grandmother’s.  It was taught to me by my mother.  And I taught it to my daughters.  There is a list of ingredients and there are directions…but it is all accomplished “by feel” and taste.  (You can do this JM!)  This is a technique more than it is a recipe.  I hope you will choose to try it, learn it (by heart…easy!), and pass it on to others.

Ingredients: (all are easily available at your local supermarket)

8 ounces unsalted butter, at room temperature  (I use freshly made butter that I buy from my local farmers’ market…)

at least a 1 pound box of powdered confectioner’s (10X) sugar (I always have two at the ready or a large bag.

1 teaspoon vanilla extract

at least 1/4 cup whole milk
IMG_0107

Directions: Have all your ingredients in front of you, ready to use.

  1. In the bowl of an electric mixer or in a large bowl using an electric hand-mixer (I usually use my hand-mixer), beat the butter and vanilla for a minute or two, until fluffy.
  2. Begin adding….by heaping spoonful…the powdered sugar.
  3. Because the mixture will be dryish…not resembling icing…add some milk.  Just a little bit, a splash.
  4. This is where the technique and trying comes in.  Continue adding sugar and a little bit of milk until the icing is the consistency to spread with a knife or spatula.  Make sure all of the butter and sugar are incorporated.  Add sugar until the mixture appears dry BEFORE adding more milk.

  5. Stop and check the texture and, of course, taste.IMG_0122
  6. With that amount of butter you should have plenty to ice an entire cake.

  7. After the cake is iced, find someone to help lick the beaters and clean out the bowl…

This icing makes any cake great…a box cake or from scratch.  It’s the icing that raises the bar!

Butter was purchased from Hillacres Pride from the Collingswood Farmers’ Market.

The photos here are of my daughter’s banana cake iced for her birthday.  The banana cake recipe follows.


Banana Birthday Cake

Ingredients:
2 1/4 cups sifted cake flour
5 Tablespoons all-purpose flour
1 1/2 teaspoons baking soda
1/2 teaspoon salt
1 cup buttermilk, at room temperature
2-3 very ripe bananas, mashed (about 1 cup)
10 Tablespoons unsalted butter at room temperature (1 1/4 sticks)
6 Tablespoons vegetable oil
3/4 cup lightly packed light brown sugar
1 teaspoon vanilla extract
3 large eggs at room temperature

Directions:
1. Preheat the oven to 350 degrees Fahrenheit.  Grease two 9-inch round pans using butter or baking spray.  I use baking spray with flour in it.

2.  Sift both flours, baking soda, and salt together into a small bowl and set aside.

3.  In a second small bowl, mash the banana and stir in the buttermilk

4.  In the bowl of an electric mixer…cream the butter, oil, both sugars, and vanilla on medium speed until light and fluffy (about 2 minutes).  Scrape the bowl with a rubber spatula.

5.  Add the eggs one at a time to the butter mixture and mix on medium speed after each addition until blended, about 10 seconds.  Scrape the bowl each time.

6.  Add 1/3 of the dry ingredients with the mixer on low speed for about 10 seconds.  Scrape the bowl.  Add 1/2 the banana mixture, mix for 10 seconds.  Scrape the bowl. Add the rest of the dry ingredients and the rest of the banana mixture and mix for 10 seconds.  Scrape the bowl and then stir the batter with a wooden spoon several times by had to mix thoroughly.

7,  Pour the batter into the prepared pans.  Bake on the center oven rack until the top is golden, springs back to the touch, and a tester inserted in the center comes out dry.  (30 to 35 minutes).

8. Place the cakes on a rack to cool completely.

9.  Eat as is, sprinkled with powdered confectioner’s sugar, or iced with butter cream icing.


IMG_8486

Moomin’s vegetable patch summer soup

My husband (known as Pop to his grandsons) is a book person.  Always has been.  Always will be.  He has been reading books to his grandsons (as he did with his daughters) since they were very very young.  He has a wonderful reading voice and even as infants they responded to him.

Our oldest grandson is five years old.  Pop and he have been sharing longer (chapter books) more interesting stories.  They’ve read many Enid Blyton books about the Famous Five and now they are reading Tove Jansson’s Moomin stories.  The Moomins are a fairytale family of Finnish “trolls” who have adventures with their friends and neighbors in Moomin Valley.  Everyone in our family now knows about Moomins.

My daughter, Moomin Reader’s mother, recently purchased the Moomin Cookbook.  She and her sons have made pancakes, cocoa, and, most recently, Vegetable Patch Summer Soup.  They went to the Collingswood Farmers’ Market and easily purchased all of the vegetables needed.

Ingredients:

2-3 carrots
4-6 potatoes
2/3 cup of sugar snap peas (in shells) or 1/4 cup fresh peas (not in shells)
1 small head of cauliflower cut into florets
2 Spring onions (optional)
1 turnip (optional)
2 cups water
1 teaspoon salt
2 cups whole milk
1 Tablespoon plain flour
1 Tablespoon butter
finely chopped chives, parsley, and dill

Directions:

  1.  Rinse and roughly chop the vegetables.IMG_7277
  2. Measure the water into a saucepan.  Bring it to a boil and add salt, carrots, peas, onion, and turnip (if using).  Allow this to simmer for 3-4 minutes then add the potatoes and cauliflower florets.  Simmer on low heat for 10 minutes or until the vegetables are almost soft.IMG_7278
  3. Cook the flour into the melted butter until it is a paste. Whisk the flour mixture into the milk and add this mixture to the soup.IMG_7280
  4. Simmer gently for a further 10 minutes.  Make sure the soup does NOT BOIL
  5. Finely chop the fresh chives, parsley, and dill.  Sprinkle the chopped herbs over the finished soup either in the saucepan or once it has been served into bowls.IMG_7279IMG_7281


The soup was a big hit.  The children were a little skeptical about the fresh herbs…but they ate it quite happily…like their Moomin friends would!

iu

Moominmama making soup!

Cauliflower and fresh dill from Muth Family Organic Farm|
Peas from Springdale Farm.
Viereck Farm sells sugar snap peas
Carrots from the AT Buzby CSA share
Potatoes from Savoie Organic Farm
Spring onion from Formisano Farm and Muth Family Organic Farm
Fresh herbs from Flaim Farm and/or Formisano Farm