CSA…CSA…CSA!

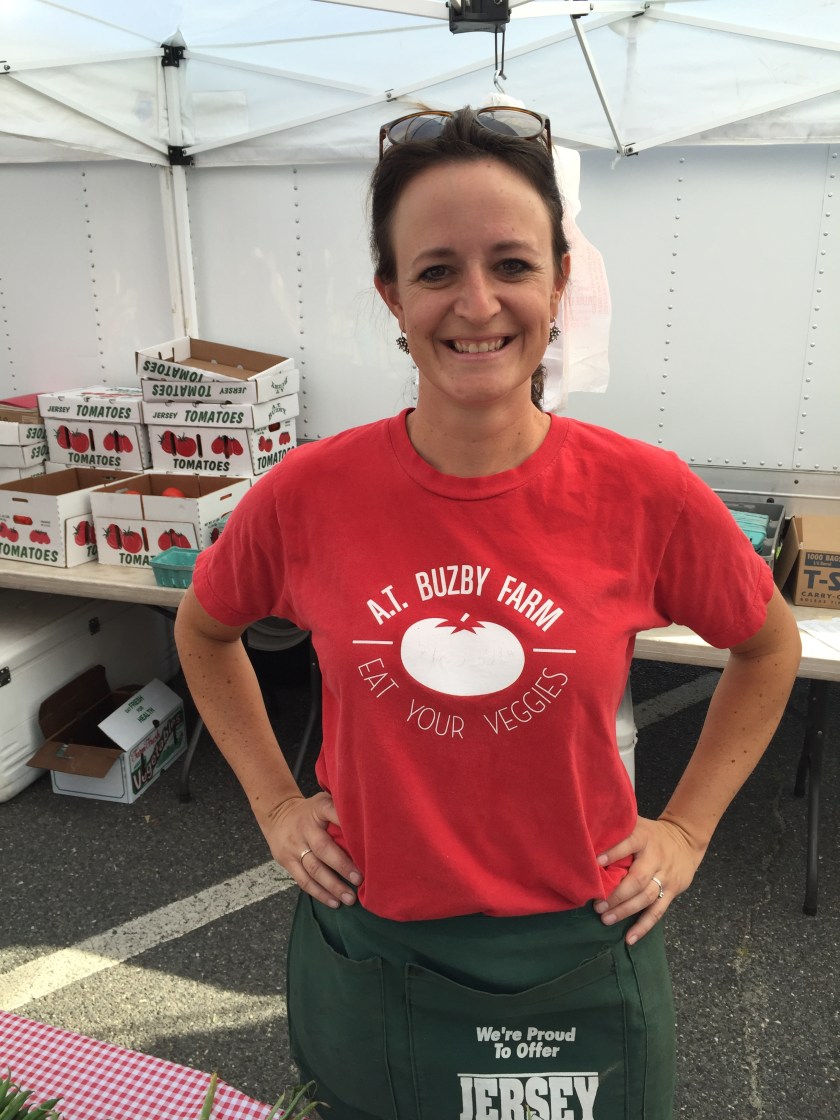
A. T. Buzby is a familiar space at the Collingswood Farmers’ market.  Theirs is always a beautiful display of NJ fresh fruits and vegetables.  If you stop by their stand,  look behind the overflowing baskets on the tables, you will see a stack of boxes.  Inside each box is a  variety of fruits and vegetables hand picked and chosen for Buzby CSA members. A half share.

CSA stands for Community Supported Agriculture.  Martie Buzby, (wife of Eric Buzby, daughter-in-law of Dawn and Andrew Buzby) says people asked to be part of this venture.  According to Martie, “they were looking for a closer connection to the source of their food”.  The first year of the CSA had ten members, mostly friends says Martie.  This year there are three hundred.

IMG_4014

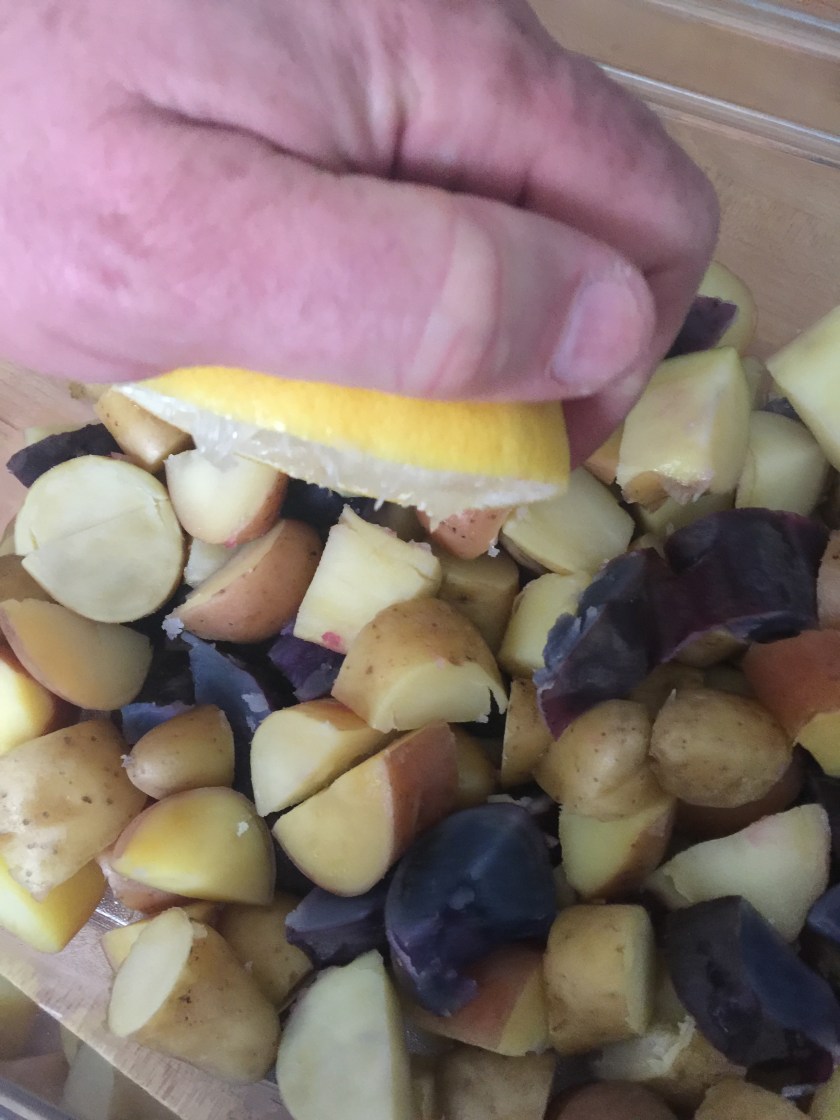
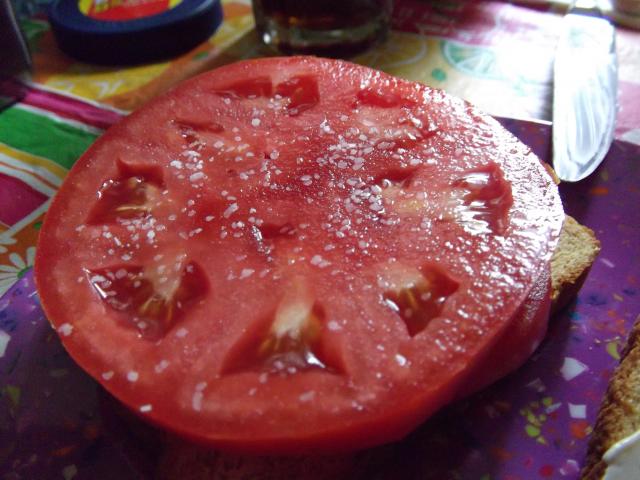
I have been a member of the A. T. Buzby CSA for a few years now.  I sign up and pay in  winter and for twenty weeks (May through October) during the market season, I pick up a box of NJ fresh fruits and vegetables.  The selection is varied and fresh and wonderful.  Some old favorites and some new things to try.

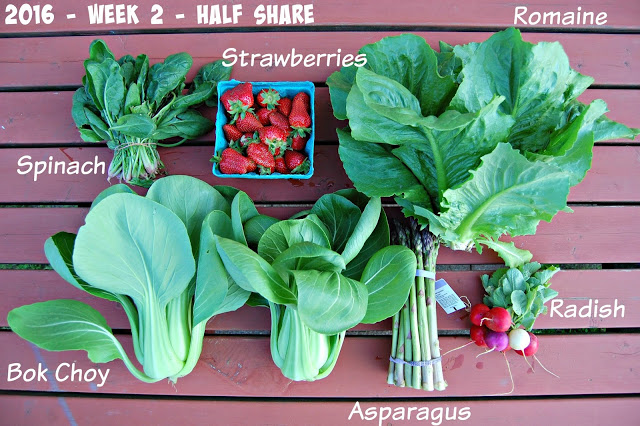
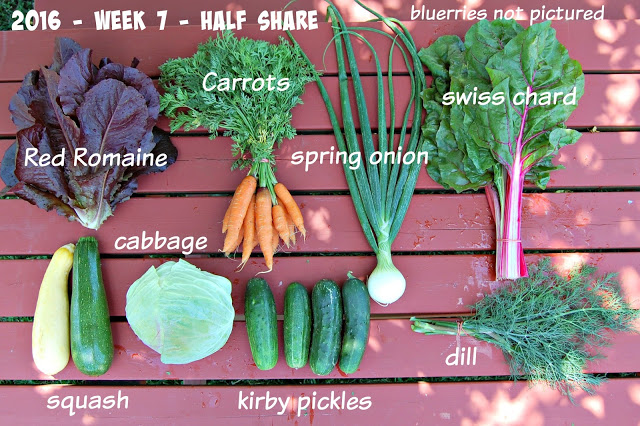
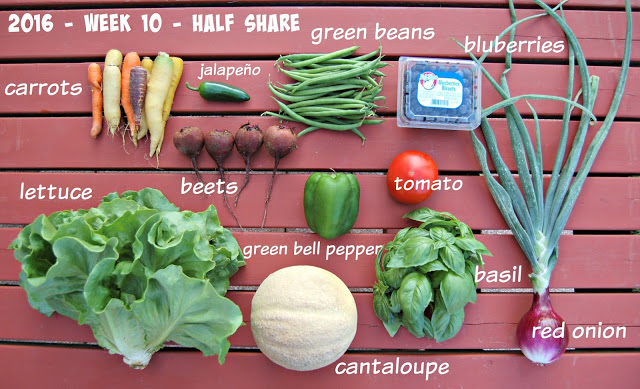
“Each week, the share consists of the best assortment of produce that is ready for harvest. Over the years, we have worked to balance the harvest so there is a nice variety each week for twenty weeks” explains Martie.

Again, according to Martie “the benefits include a great value on fresh produce, an opportunity to support local business, a way to help preserve farmland and a working family farm, a way to reconnect with the seasonal nature of food…”

There is a very small risk.  If the season is poor everyone suffers the loss…farmer and CSA member.  But, if the season is good there is an abundance of crops and you, as member, will get more than you anticipate.

Martie writes a corresponding blog that is full of recipes and she posts a photo of the share for the week so the member knows what to expect.    The farm also has a Spring  Open House where CSA members get a tour of the farm and can pick strawberries.  In Fall they offer a wagon ride to their pumpkin patch and CSA members may pick a pumpkin.

2016 week 2

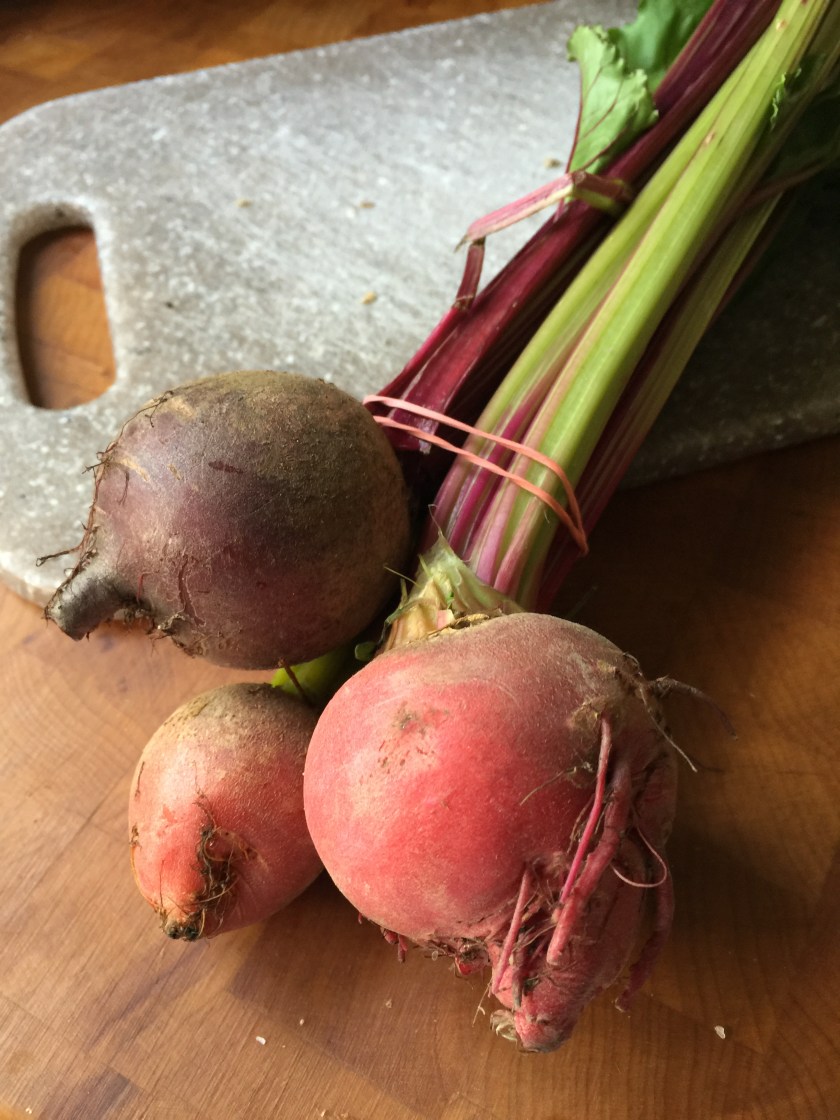
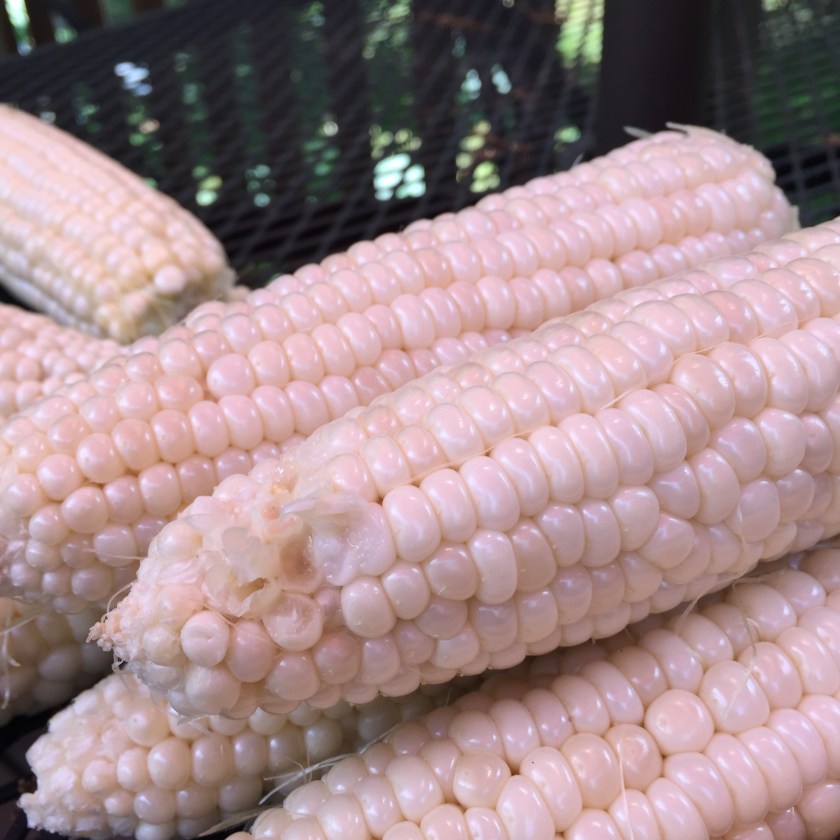
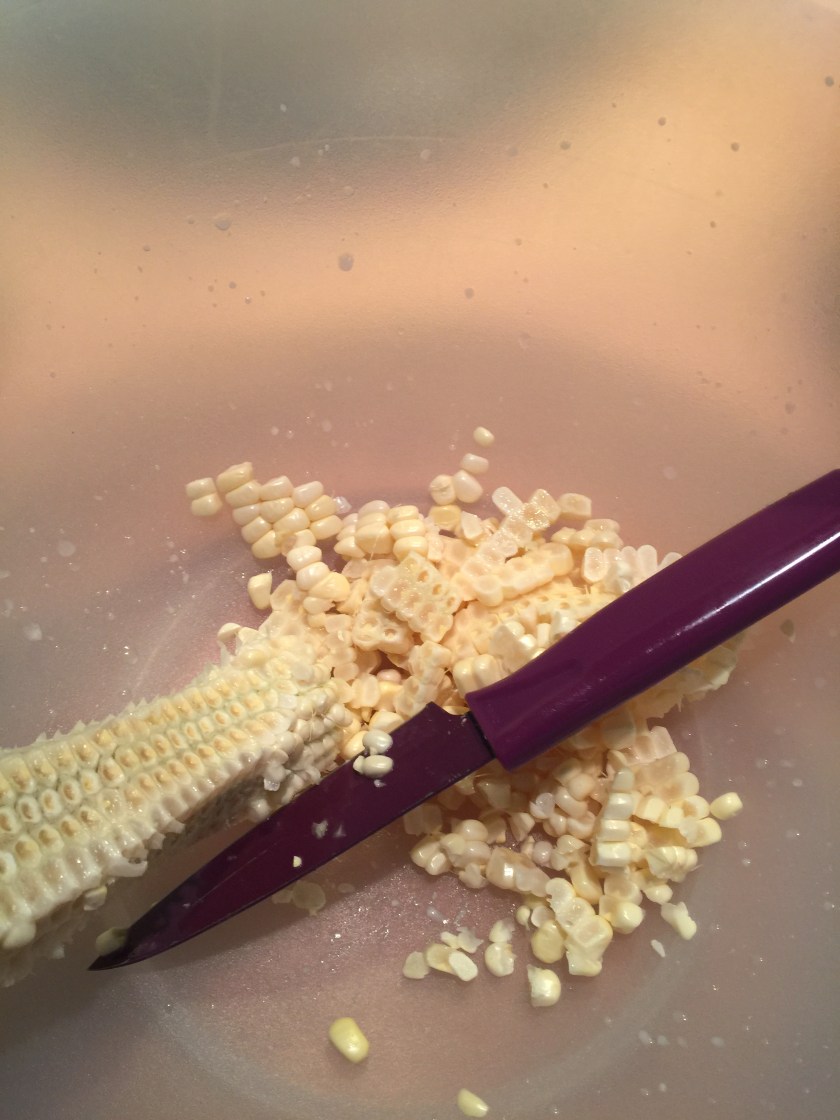
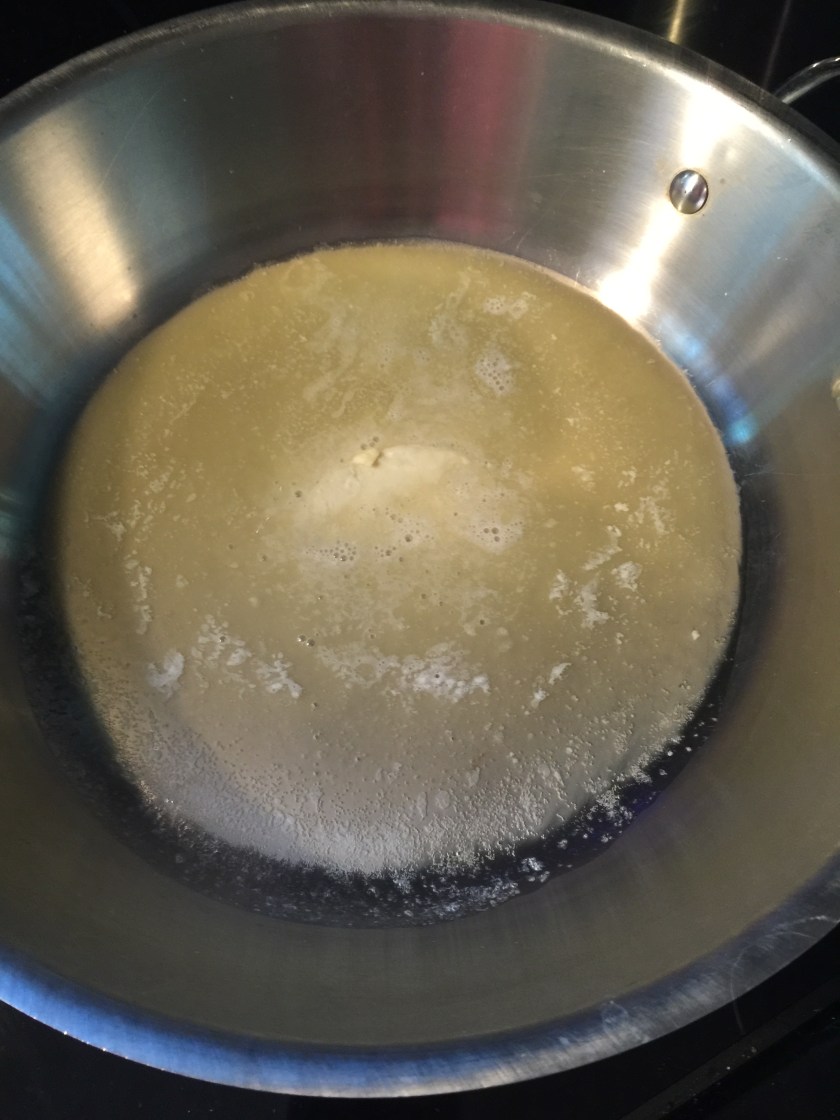
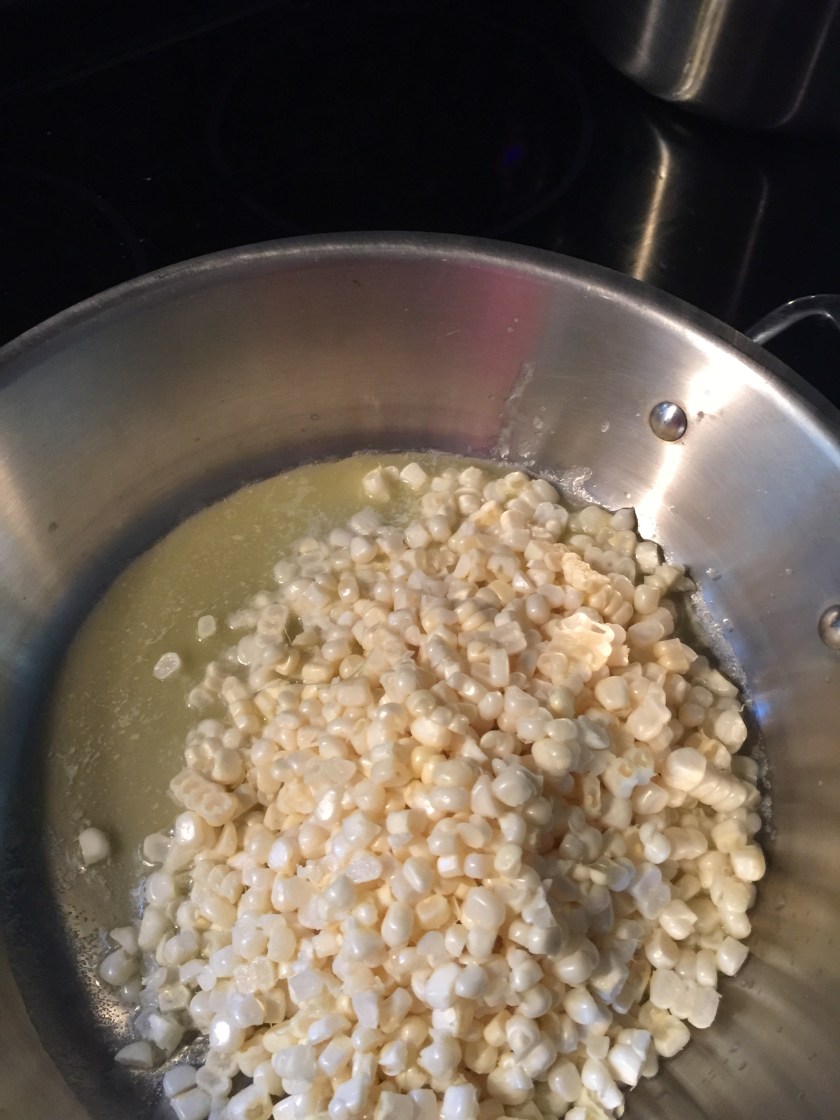
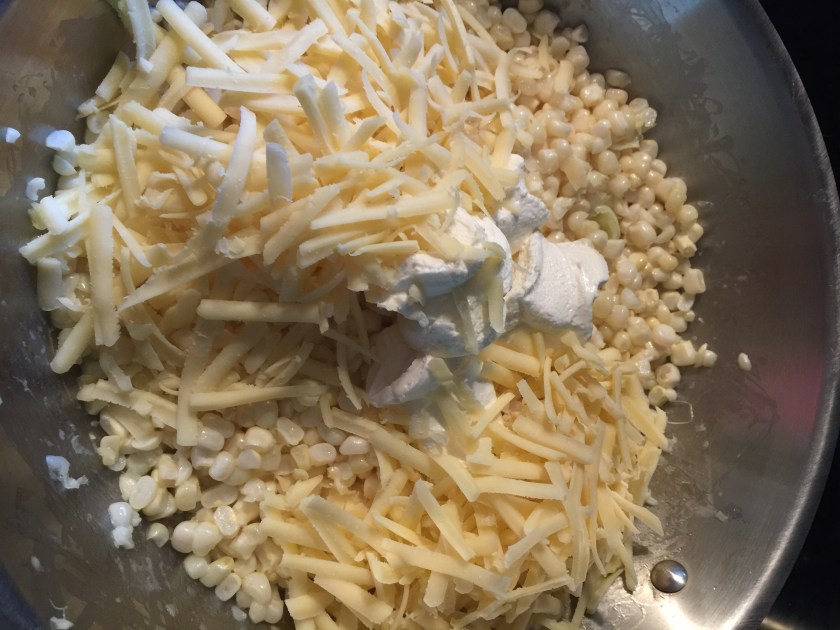
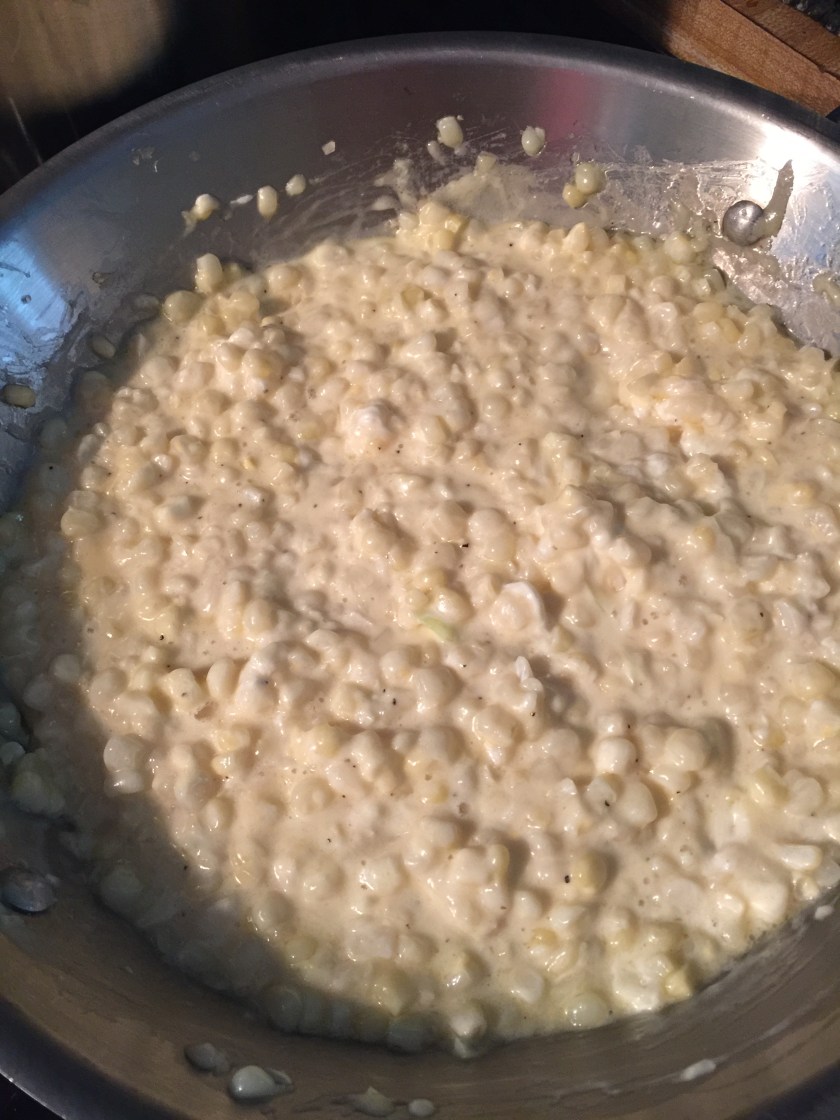
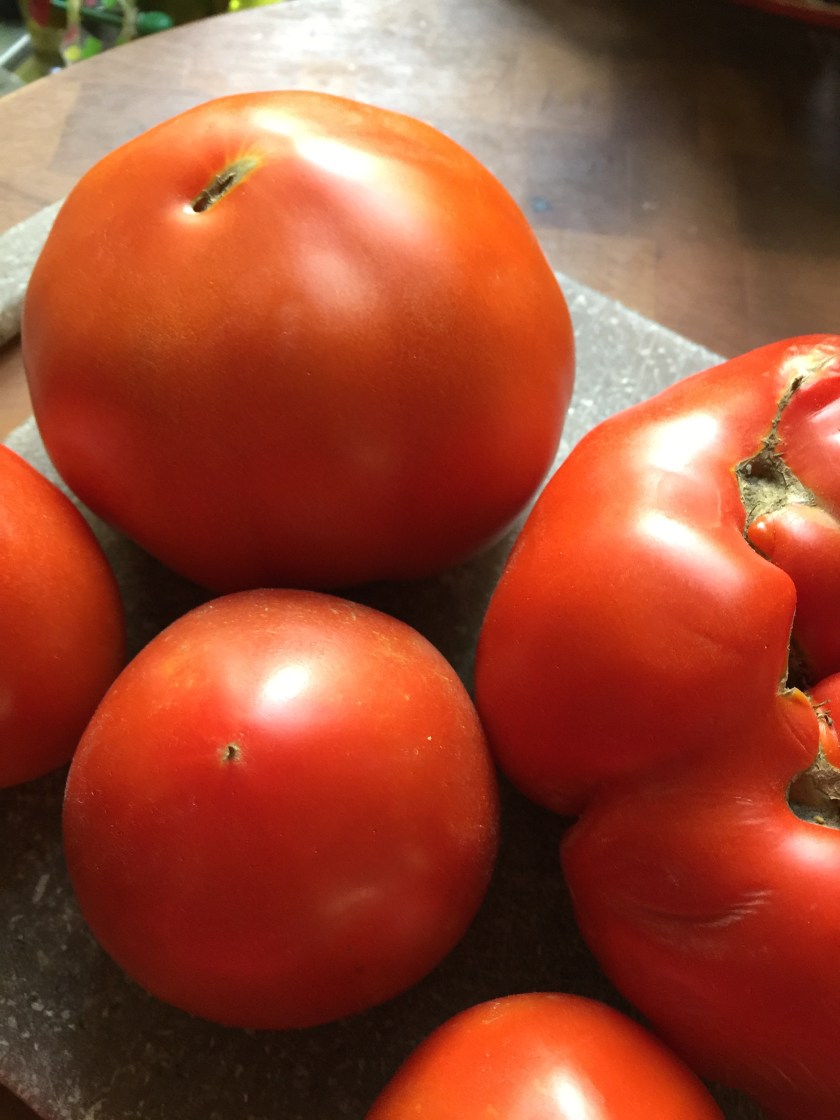
I love all of A. T. Buzby’s fresh fruit and produce…their corn is incredible….their melons are sweet and delicious.

I buy a half share every year and pick up one box each week at the market.  A whole share is two boxes.

2016 week 7

Last week we had a family issue that needed attention so we only had time to pick up our share and, sadly, could not shop the whole market.  One half share provided my husband and I with sufficient NJ fresh fruits and vegetables for the week.

If you’re on a budget or in a time crunch…A.T. Busby’s CSA is a wonderful way to experience NJ fresh produce.  Twenty weeks.  Five months of produce.

2016week10

Stop by their stand at the market.  See what they offer…and consider becoming an A. T. Buzby CSA member.   You won’t regret it.

Here is Martie’s recipe for turnip shuffle…my two year old grandson loves it!

Turnip Soufflé
3 to 4 turnips, peeled and sliced ½ cup butter
1 ½ tsp. salt, divided 2 Tablespoons flour
½ tsp. sugar 2/3 cup milk
4 eggs, separated 3 bacon strips, cooked and crumbled

1. Place turnips, ½ tsp. of salt and sugar in a saucepan; cover with water. Cover and cook until turnips are tender, about 15-20 minutes; drain well and mash (do not add milk of butter)
2. In another saucepan, melt butter; stir in the flour and remaining salt until smooth. Add milk; bring to a boil. Cook and stir for 2 minutes. Beat egg yolks in a small bowl; gradually stir in ½ cup hot milk mixture. Return all to pan cook and stir for 1 minute. Stir in turnips; remove from the heat. Beat egg whites until stiff peaks form; fold into batter. Spoon into a greased small casserole dish. Sprinkle with bacon. Bake, uncover at 350 for 30 minutes or until golden brown.


dbfb6740da094fa1cb72e6bf52af451a

Kerplink, kerplank, kerplunk.

My grandson has just discovered the joys of blueberries thanks to Robert McCloskey and his wonderful children’s book “Blueberries for Sal”.  Sal and her mother go blueberry picking and are followed by a hungry little bear with a big appetite for blueberries.  When the blueberries are dropped into the empty pail (because the little bear eats the berries faster than Sal and her mother can pick them) they make the sounds “kerplink, kerplank, kerplunk”!

My husband has always been a huge fan of blueberries and Robert McCloskey (…think “Make Way for Ducklings” too).  During blueberry season he eats a pint container every morning.  The whole thing.  Every morning.  And husband has pronounced this year a very good year for blueberries.  Very sweet and plump.

Fortunately the farmers at the Collingswood Farmers’ Market have an abundant supply of NJ blueberries.  The berries I used for this recipe (as we keep track so husband can critique) were purchased from Brookeberry Farm.  This is a certified organic farm.

This week I also purchased blueberries from Springdale Farm, A. T. Buzby, DanLynn (organic), Fruitwood Farms, and Rick Hymer.  But there are at least a half dozen more farmers offering blueberries for sale that I missed.  And according to husband all are sweet.  Next week I’ll try the rest!

This recipe was developed in 1954 by a Chicago teenager.  It has circulated for nearly 60 years (especially now via the internet) because it is supposed to have the power to get you a boyfriend.  Hence the name of the recipe….Blueberry Boy Bait.  I’ve been with my (husband) boyfriend over 35 years so I figured I couldn’t go wrong.  And I didn’t.  He loved it!

This is a very simple and delicious recipe that uses 3 cups of blueberries!   And it is certainly a recipe that children can help with.

IMG_4007

Blueberry Boy Bait

Ingredients for the cake:
2 cups all-purpose flour
1 cup granulated sugar
2 teaspoons baking powder
1/4 teaspoon table salt
2/3 cup vegetable or canola oil
1 cup milk (I used 1%)
2 large eggs (from DanLynn Farms…love those pastel green ones!)
3 cups blueberries, fresh OR frozen (so you can make this all year!)

Ingredients for the topping:
3 tablespoons sugar
1 teaspoon ground cinnamon

Instructions:
1.  Preheat the oven to 350 degrees Fahrenheit and butter a 9×13 inch baking pan.
2.  In a medium bowl, whisk together the flour, sugar, baking powder, and salt.  Add the oil, milk, and eggs.  Mix with an electric mixer (I used an electric hand mixer) for about 3 minutes.
3.  Pour the batter into the prepared pan, then evenly sprinkle the blueberries on top.

IMG_3992
4.  In a small bowl, combine the sugar and cinnamon, then sprinkle it over the blueberries.


5.  Bake until a cake tester inserted in the center comes out clean, about 50 minutes.  (just enough time to clean up the kitchen and read “Blueberries for Sal”!

IMG_4004

With the abundance of sweet, beautiful blueberries this year, I am freezing them for future pancakes, muffins, and boy bait.  Simply rinse, let dry thoroughly (I spread them on paper towels), pour into a plastic freezer bag, and toss the bag into your freezer.


Yes, you can make potato salad.

“It is always wise to make too much potato salad.  Even if you are cooking for two, make enough for five.  Potato salad improves with age — that is, if you are lucky enough to have any left over.”  — Laurie Colwin

IMG_3974

Summer is the season of potato salad.  At least once a week someone is firing up the grill and tossing on some burgers or chicken or hot dogs or steak or Portobello mushrooms.  And anytime that happens it’s always time for a big bowl of potato salad.

Strolling past the vendors at the Collingswood Farmers’ Market this week, my daughter spotted red, white, and blue fingerling potatoes at Formisano Farms’ stand.  I quickly bought them.  I love when I can get a variety of colors.  And I stepped across the way and picked up a couple of bunches of my favorite organic scallions from DanLynn Farm.  With those in my wagon I was all set!

This is an easy recipe for a delicious potato salad.

Ingredients:
5 lbs. of your favorite potatoes, cut into uniform and bite -sized pieces
1 large lemon (the juice of)
1 rib of celery, diced
2 scallions (green part included)  or 1 small red onion, diced
1 tablespoon of dried or fresh dill weed
salt to taste
1 cup of mayonnaise

Directions:
1.  Wash and trim the blemishes on your potatoes.  Cut the potatoes into uniform, bite-sized pieces.  ( A word here about the potatoes.  I think this recipe works best with young potatoes…spring, red skin, fingerlings, Yukon Gold.  Scrub them.  Trim them.  Leave the skin on.  This recipe also works with russet potatoes…the older ones.  Scrub them…but peel them.  The skin on a russet potato is tough and not very appetizing.)

2.  Put the cut potatoes into a large pot of water.  Cover the cut potatoes in the pot with about an inch of water.  Bring the water to a boil.  Then turn down to a simmer.  Simmer the cut potatoes for 20 to 30 minutes or until a knife easily slides into the soft potato.

3.  Drain the potatoes in a colander in the sink.  Let the potatoes sit for about 10 minutes until they are dry.  They should still be warm though.  Do not let them cool.

IMG_3957

4. Dump the warm potatoes into a container and squeeze the lemon over all the potatoes.  Put a cover on top and refrigerate until the potatoes are cold, at least one hour.

IMG_3965

5.  When the potatoes are cold, take them out of the refrigerator and put them in a large bowl to mix the salad. Add the diced celery and onions, the dill, and salt to taste.  Next put in about a cup of mayonnaise (for 5 lbs. of potatoes…use less for fewer potatoes).  Mix all ingredients and you are done!  Put the salad back into the refrigerator until ready to eat.

6.  Modifications: add chopped hard boiled eggs (husband hates hard boiled eggs); add 1 teaspoon of jarred mustard or 1/2 teaspoon of dried mustard powder, especially good with Hillacres Pride’s sausages and hot dogs (omit dill if using mustard); mix in 1/2 cup of mayonnaise and a 1/2 cup of sour cream (use dill); add Hillacres Pride bacon anytime!

This potato salad is easy and delicious.  And consistent.  The recipe always works.

And if you are lucky enough to have some left over…it is delicious eaten right out of the container.  In front of your open refrigerator.  For breakfast!


Corn off the cob.

IMG_3750

My husband has a beard.  He has for forty five years.  My husband loves sweet NJ corn smothered with butter and sprinkled with salt.  BUT he won’t eat corn on the cob because he hates getting butter in his beard.

So, because I’m nice that way, and because I hate for anyone to give up delicious food without a fight….I make corn OFF the cob.

First buy six to twelve ears of delicious sweet NJ corn from your favorite farmer (or farmers).  At the Collingswood Farmers’ Market, A. T. Buzby and Les Viereck both had beautiful white corn for the first time this week!  Each showed an ear for their patrons.  And it was beautiful!

(a word here…..one should not shuck (peel) the corn until one is ready to use it.  The husk keeps the corn moist and fresh and when you break that seal by  pulling down a piece or even completely shucking it (our local supermarkets have garbage cans next to their corn displays so one can peel and toss …terrible!).  And, if one pulls down the outside to check the inside, and then tosses it back on the table…one has just ruined a piece of produce for the next guy.  The green on the outside of the corn cob keeps the corn fresh and moist.  Right now I have a dozen ears of corn in my refrigerator still in their fine greenery.

When I shop at the Collingswood Farmers’ Market, as I have done since it’s beginning, I simply ask the farmer for what I want.  I may request big or small (usually small) but I trust the farmer has brought his best produce for me to feed my family.  When asked to choose what cucumber I want or zucchini or ear of corn I simply say “you pick, I trust you”.  I’ve never ever been disappointed. Do not hesitate to take that prepackaged bag of corn…it is prepackaged for your convenience. Everything sold by our farmers is awesome!)

Back to the corn…This is what to look for, beautiful green on the outside.  The only thing dry should be the silk at the very top.  That’s it.  Inside will be a beautiful and delicious ear of corn.  (Did you know that you can eat corn raw?   Those are teeth marks.  I tasted the corn because it smelled so sweet… Like candy my husband agreed).

IMG_3812

When I cook corn I shuck it, and cut the kernels off the cob with a small knife and a big bowl.

IMG_3818

Then I put a generous hunk of Hillacres Pride unsalted butter into the pan to melt.  Once melted I toss in the corn.  Stir the corn around in the butter for five minutes or until it is to your liking (taste it!).  And it’s done!  Sprinkle with some salt (and pepper if you like). Serve.

IMG_3821

IMG_3822

You can add diced zucchini to this…or diced peppers…or a dollop of heavy cream.  This preparation is easy and delicious and, more to the point, doesn’t leave butter in your beard!


Recently my family has discovered a barbecue restaurant that serves Cheesy Corn.  The above corn off the cob can easily be turned into Cheesy Corn.

Ingredients:
six ears of corn cleaned and with kernels cut off the cob
1/4 cup butter, melted

(for cheesy corn)
1/4 cup cream cheese
1/2 cup grated cheddar cheese

After you’ve cooked the corn in the butter, drop  four ounces of cream cheese and eight ounces of grated cheddar cheese into the corn and butter mixture.  Stir.  Put a lid on the pan.  Turn off the heat.  Let the cheeses melt.  Stir again.  Serve.

IMG_3825

IMG_3827


Enjoy!


Jersey tomato sandwich. OMG!

At the Collingswood Farmers’ market this week two farms had VINE RIPENED JERSEY TOMATOES.  Springdale Farms and Viereck Farms.  Springdale offered boxes of neatly stacked small tomatoes and Les Viereck offered small, medium, and large priced by the tomato.  I, of course, bought some of all.

IMG_3814

My father (one of eight children raised during the Great Depression!) talked about baked bean sandwiches, ketchup sandwiches, and onion sandwiches.

I often eat a salad sandwich.  That is a sandwich, usually on a roll, of lettuce, tomato, cucumber, red or green pepper, a piece of cheese, and mayonnaise.  For those sandwiches just fresh everything is good enough.  But to make a Jersey tomato sandwich one must have a JERSEY TOMATO.  Nothing in the world tastes like them.

So here we are.  It’s lunch time.  And I have fresh, vine ripened Jersey tomatoes picked and purchased this morning.

Ingredients: one sliced vine ripened Jersey tomato, mayonnaise, fresh soft bread (wheat or white, but white is traditional), and a sprinkle of salt.

DSCF4369-640x480

Directions:  Slice the tomato as thick or thin as you prefer. Spread mayonnaise liberally on soft bread. Layer on the sliced tomato.  Sprinkle with salt.

Heaven!

If you are a New Jersey native  you don’t need these directions.  You just need to know where to get those tomatoes.  If you are not a New Jersey native and have never eaten a true Jersey tomato sandwich prepare to be delighted!

DSCF4372-640x480

Simple summer salad.

My younger daughter named this Summer Salad.  Before that is was that tomato and cucumber salad.  Summer Salad is much more appealing.

Rick Hymer of Monroeville is one of my favorite farmer’s at the Collingswood Farmers’ Market.  He starts slow and finishes with a bang!  When the market opens Hymer Farms’ stand has plants.  Beautiful hanging plants, bedding plant, vegetable plants for your home garden, and, my favorites, herb gardens and patio tomatoes.  I have  a shady property and the herb garden I buy every year from Mr. Hymer sits right by my back door for easy picking.  And the patio tomatoes grow perfectly in the small spotlight of sun I have on the kitchen side of my house. Of course I buy my tomatoes at the market, but there is something very special about a tomato picked and eaten still warm from the sun.

Currently the tomatoes sold at the market are hot house grown tomatoes.  That means they are grown right here.  But inside greenhouses.  They are still Jersey tomatoes and they taste delicious after a long winter.  We’ll talk again when the field tomatoes ripen but don’t shy away from the hot house ones.  Delicious.

This week Mr. Hymer had vegetables!  Potatoes, onions, cucumbers, peas, and hot house tomatoes.

I had picked up some green onions (or scallions) and when I saw the beautiful tomatoes and cucumbers I knew what I was making as a side dish with my dinner.  Summer Salad!

This recipe is super easy.  You can make it in the morning and it will be ready for dinner.  You can make it and eat it right away.  You can make it and take it along to a friends or for a picnic.

Take a cucumber, a green onion, and a large tomato.  IMG_3797
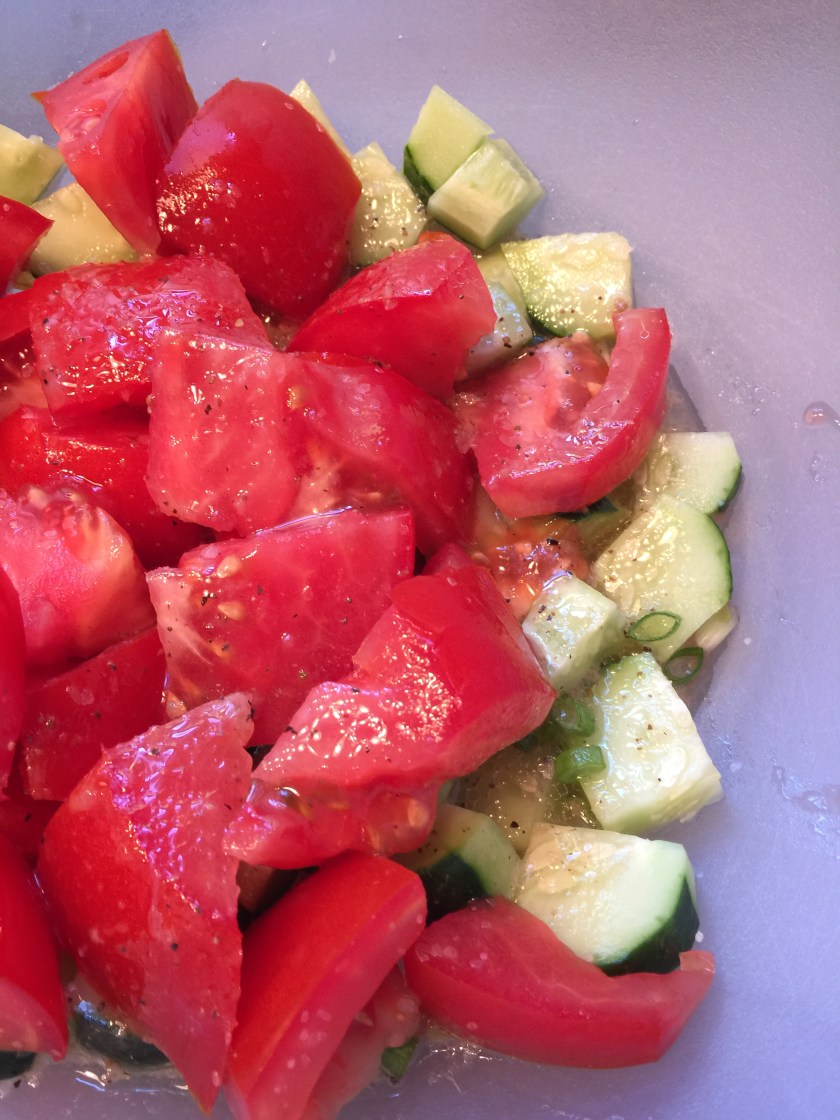
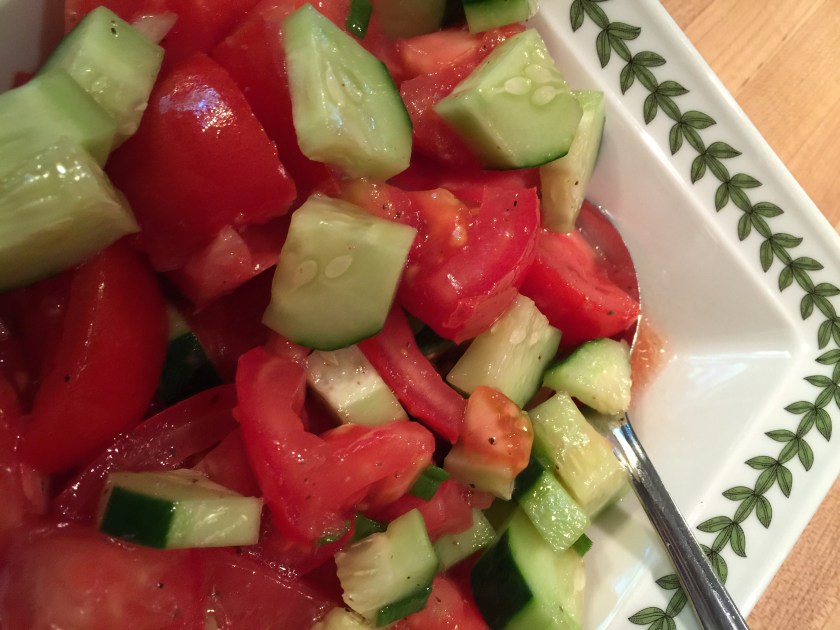
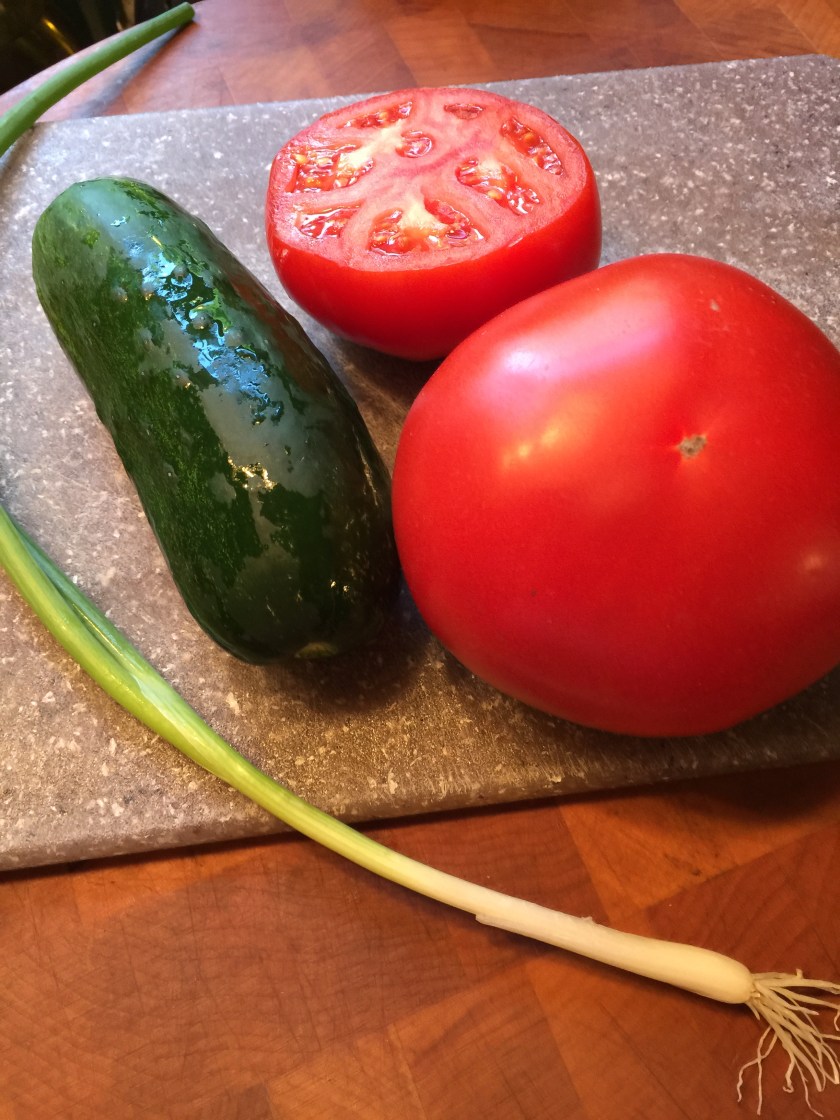
Cut the ends off the cucumber.  (Did you know if you slice the cucumber stem to flower it will be sweeter.  I didn’t believe it either…).  Slice both the white and the green of the onion into tiny rings.  Cut the stem out of the tomato and coarsely chop.  Put the cucumber pieces, tomato pieces, and green onion pieces into a bowl.

Sprinkle a pinch of salt over all.  Pour two to three tablespoons of your favorite vinaigrette into the bowl and stir to coat.  Let it sit a while.IMG_3802

Finish preparing your dinner.  Go sit under a tree with a cool drink.  Do the crossword puzzle.  Spoon the salad into a pretty dish and serve.

IMG_3804


Zee Bread (for John Willis)

It’s mid June and already my favorite Collingswood  Farmers’ Market farmers are selling zucchini…small, medium, and LARGE.

IMG_3758

Everyone who loves zucchini knows that the frighteningly large ones come later and are wonderful for zucchini bread.  Already Les Viereck had large ones!  Ask him why…he’ll tell you.  That man knows his stuff and loves his farm.

Decades ago husband and I had a friend who loved this particular bread and lovingly called it Zee Bread.  Once he said it we changed the title to honor and remember him.

This particular recipe has been modified from the original but only in good ways!

This recipe makes two large loaves.  Pans must be greased and floured.

Ingredients:
4 cups grated zucchini (4 little, 3 medium, 2 large, or 1 gigantic)
1/2 cup vegetable oil
1 1/4 cups sugar
3 eggs, beaten
1 teaspoon vanilla
3 cups flour
1 1/2 teaspoons baking powder
1 teaspoon baking soda
2 teaspoons cinnamon
1/ teaspoon salt
1 cup raisins (I use golden, but any will do)
1 cup walnuts, coarsely chopped

Directions:
1.  Preheat oven to 350 degrees Fahrenheit
2.  Grease and flour two standard (8 1/2″ x 4 1/2″) oaf pans
3.  Grate zucchini

IMG_3759
4.  Beat together the sugar, oil, eggs, and vanilla
5.  Mix together, in another bowl, the flour, baking powder, baking soda, cinnamon, and salt.
6.  Mix together the sugar and egg mixture, the flour mixture, the grated zucchini.  Alternate the flour mixture and the zucchini.

IMG_3765
7.  When the batter is completely mixed, stir in the raisins and nuts
8.  Pour batter into greased loaf pans and bake for one hour at 350 degrees Fahrenheit (until tester toothpick comes out clean)

Delicious for breakfast with cream cheese and a cup of hot tea.  Or as dessert with cream cheese and a glass of iced tea.  Either way, zucchini bread always tastes better on the back porch.

There you have it.  Easy. Delicious.  And it uses 4 CUPS OF ZUCCHINI!


I’m feeling beet.

quote-what-did-the-carrot-say-to-the-wheat-lettuce-rest-i-m-feeling-beet-shel-silverstein-86-27-42

Collingswood Farmers’ Market.  Early morning.  Stroll the avenue.  Things that are waning…asparagus, strawberries.  Things that are making their first appearances…zucchini, summer squash, cherries, beets.

Beets?!

Yes.  Beets.

Here is an easy, delicious, and (dare I say) elegant way to eat your beets.

At the most recent market many of the farmers had beets.  Golden are a beautiful addition to the party.  Red is standard and rich.  But DanLynn had a mixed bunch of organic beets that came in three different colors.

IMG_3736

First scrub your beets to get all the dirt off.

Next cut off the top and trim the bottom. (Tops can be eaten too).

Wrap each beet in its own piece of foil.  Put on a tray and bake at 350 degrees Fahrenheit for about an hour.  Check to see if the beet is done by squeezing the foil ball.  If there is some give in the beet, it’s done.  If not…bake a little longer.  You’ll know by squeezing if the beet is done (similar to baking potato).

IMG_3756

Unwrap the beet and peel it with your fingers or a knife.

IMG_3768

Slice into thin slices and drizzle with your favorite vinaigrette dressing (your own or bottled).

IMG_3777

Delicious on a salad or as a salad or side dish.

These are great to take to a picnic.  Pop them in a jar with the vinaigrette and chill.  They keep for days.

My mother’s carrot cake.


Forty five years ago my mother adapted a carrot cake recipe she’d been given reducing the oil by half and adding applesauce to make up the difference..  That may not seem like such an innovation right now, but when my mother did it, it was inspirational.  And delicious.

What follows is the recipe for my mother’s carrot cake.  It is a little bit of work, but, truly worth the effort.

A couple of things before you get started.  One, grate your carrots first.  Two, allow an hour to bake and twice that to cool.  Three, this is a BIG cake. (I once tried to make cupcakes, at my husband’s request.  This recipe makes 4 million cupcakes.  Don’t do it.  Save yourself!) And, finally, this cake  is delicious the day it’s baked…but it makes your knees weak the next day.

IMG_3709

INGREDIENTS:
1/2 cup vegetable or canola oil
2 cups granulated sugar
4 eggs beaten.
2 cups flour
2 teaspoons cinnamon
2 teaspoons baking soda
2 teaspoons baking powder
3 cups of fresh grated carrots (straight from your farmer are the sweetest!)
8 ounces (1 cup) apple sauce (homemade with apples fresh from the orchard is great!)
1 cup of golden raisins (but any raisins will do)

Electric mixer.

13 x 9 inch pan.

DIRECTIONS:
1. Preheat the oven to 350 degrees Fahrenheit.
2. Grate the carrots and set aside.
3. Mix together the flour, cinnamon, baking soda, and baking powder.
4. Beat together the oil and sugar.  Add the eggs.
5. Spoon the flour mixture into the bowl with the oil, sugar, and eggs.  Beat together until blended.
6.  Slowly add the grated carrots, apple sauce, and raisins…alternating until all are added.
7. When all ingredients are combined, pour batter into a greased and floured 13 x 9 inch pan and bake in a 350 degree (F) oven for an hour or until done (when a cake tester or toothpick comes out of the cake with nothing or a crumb on it).
8.  Cool for 90 minutes to two hours before you ice.  Don’t skip the icing.  Really, don’t .

Ice with butter cream icing:  Beat together a stick of good quality salted butter, 1 teaspoon vanilla extract, 2 tablespoons milk (or more to get the desired consistency), and nearly a pound of powdered sugar (or less, to get the desired amount and consistency).  This icing is delicious but is a feel by recipe.  No exact amounts.  Try it.  Work our your sweetness and texture.  It will be one of those recipes you just know how to do.  And one you will return to often.


IMG_3724